Класс и объект в C++
1. Заметка при открытии Eclipse
Если вы работаете с: Windows 64bit + Eclipse 64bit + Java64bit, вам нужно открыть Eclipse с авторизацией Administrator, есть одна проблема это Eclipse не печает message на экран Console в случае запуск в обычном моде
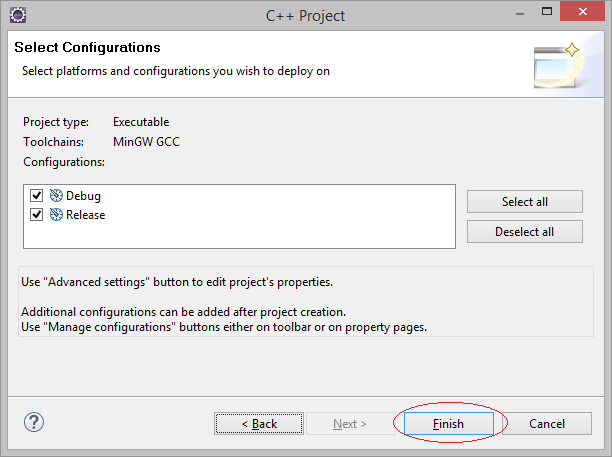
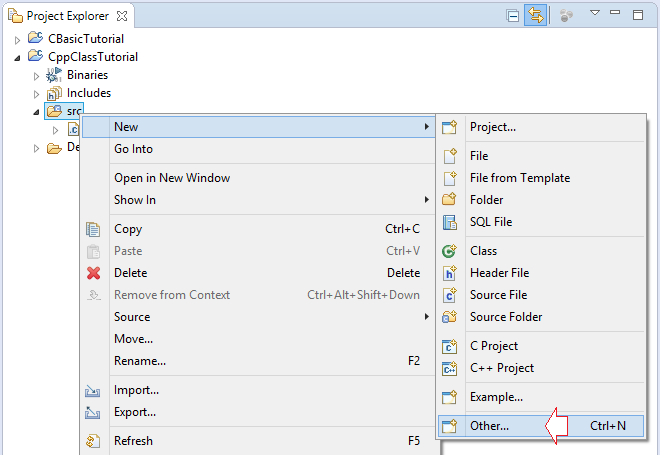
2. Создать project C++ в Eclipse
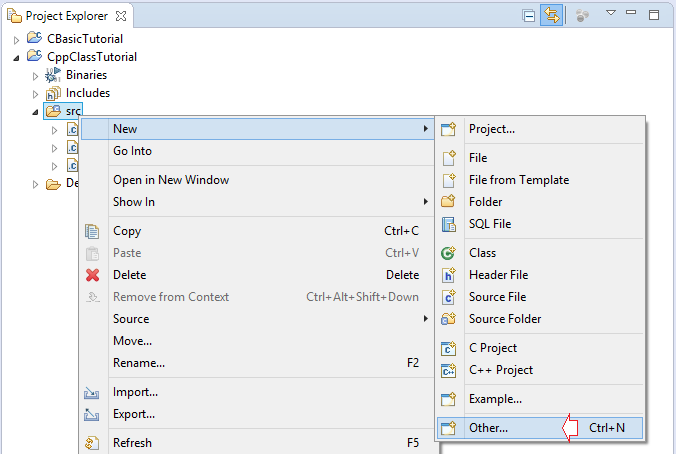
В Eclipse выбрать:
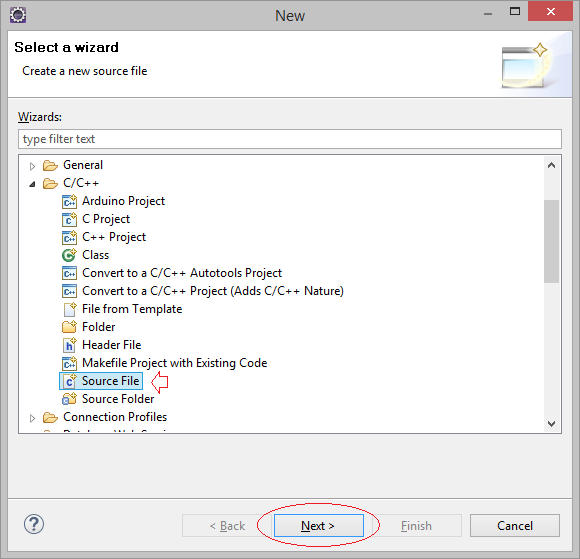
- File/New/Other..

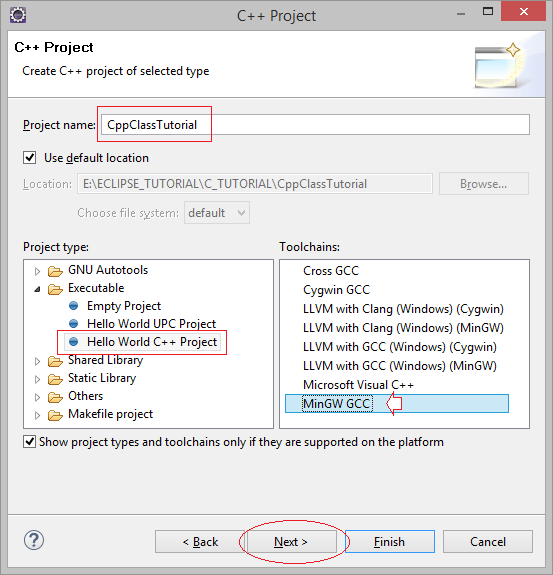
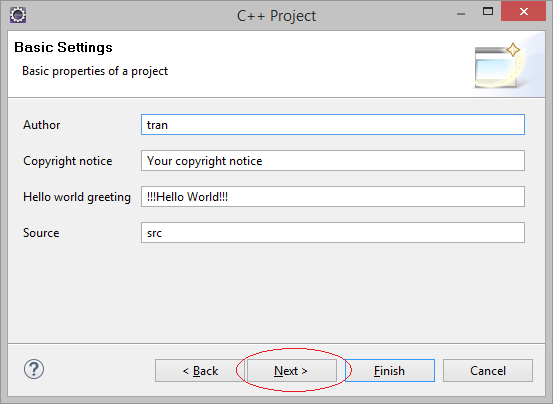
Ваш Project создан.
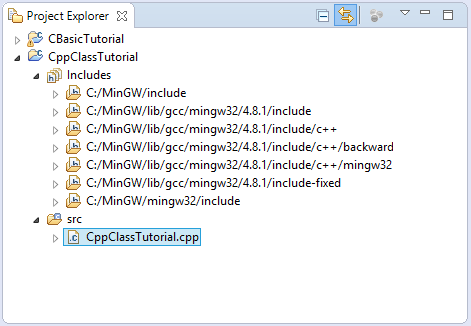
Ваш Project создан, есть готовый файл ресурса cpp, мы объясним структуру ресурсного файла позже,
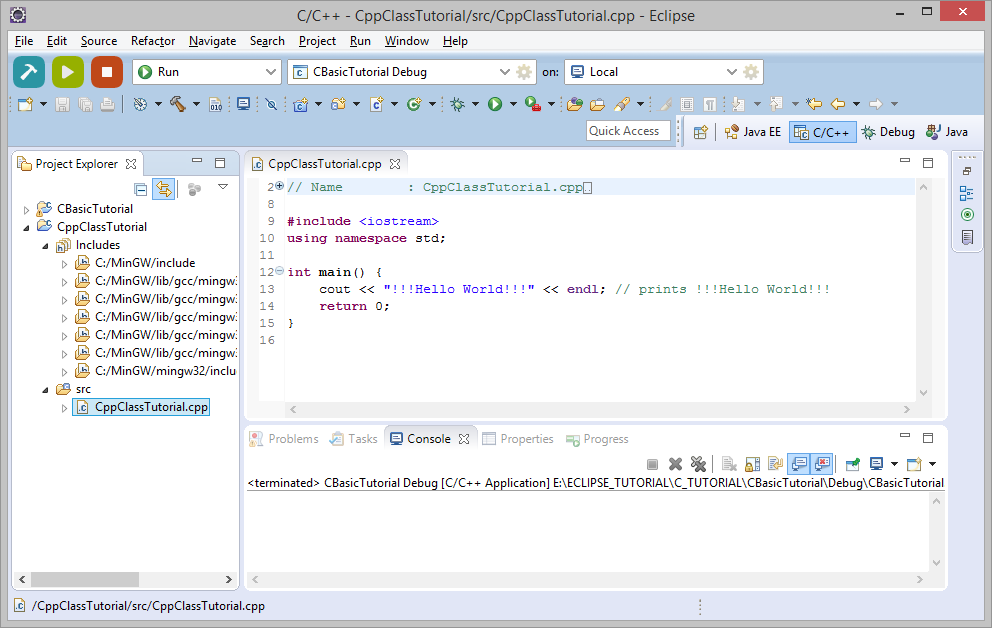
3. Запуск приложения C++
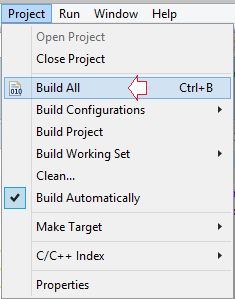
В первый раз, вам понадобится компилировать ваш project. Нажмите на Project и выберите "Project/Build All".
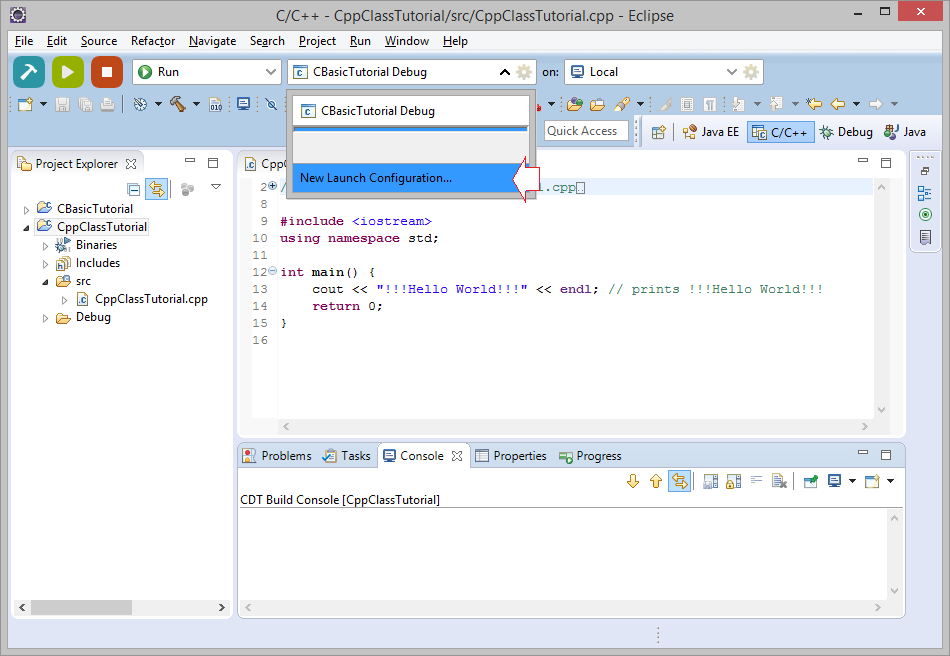
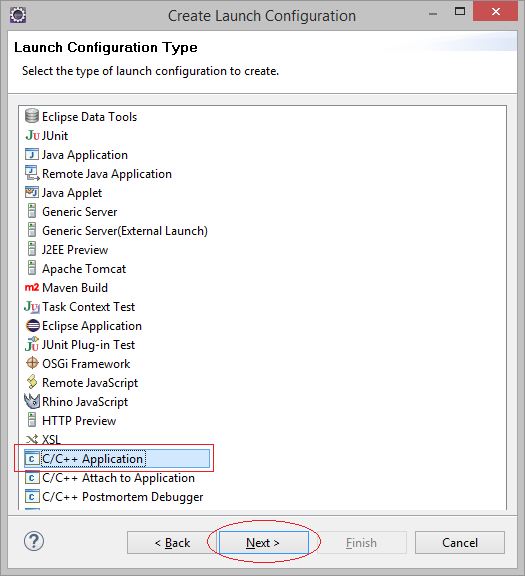
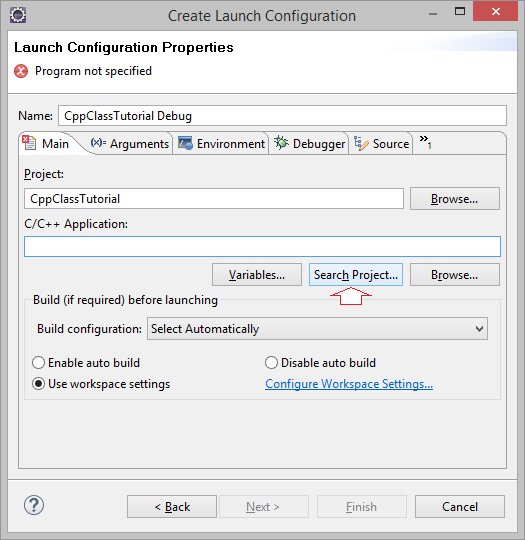
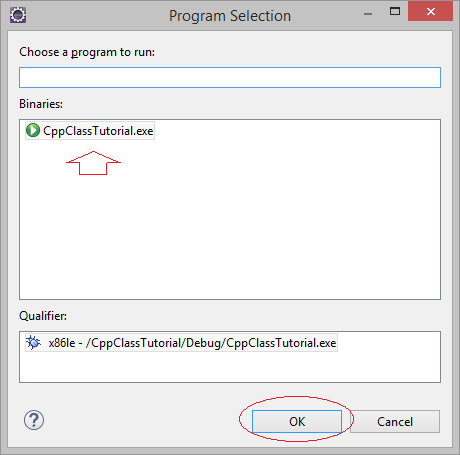
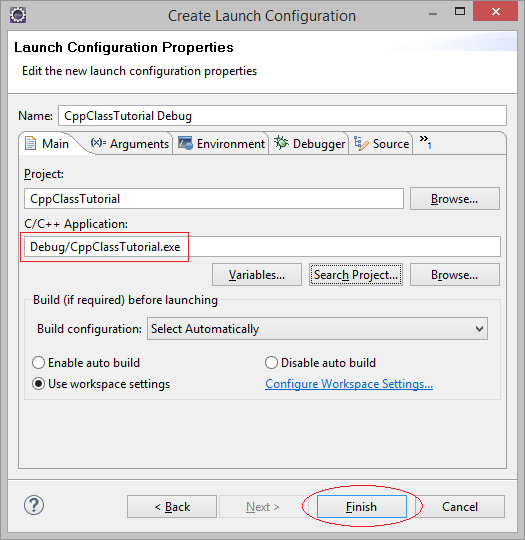
Возможно в вашем Eclipse есть несколько Project, чтобы запустить настоящие Project, вам понадобится добавить новую конфигурацию.
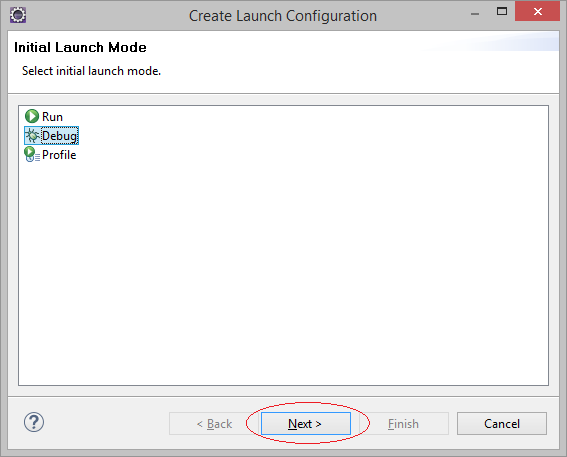
Вы программируете, вам следует выбрать мод запуска DEBUG.

4. Объяснение структуры программы C++
Выше, вы запустили простую программу C++, она печатает на экран строку. В C чтобы распечатать строку, вы используете printf, но с C++ вам нужно использовать cout, конечно все функции C продолжают быть использованными в C++.
Давайте посмотрим способ использования cout:
// Cout command used to print a string to the screen:

cout << "One";


// Print a string "One " and next is string "Two ".

cout << "One "  << "Two ";


// Print a string "One " next string "Two " and next number 3.

cout << "One " << "Two "  <<  3 ;

// Print a string "One" and next is newline character.

cout << "One" << endl;- TODO
5. Ваш первый класс
C++ вышел с главной целью это объектно-ориентированное программирование на языке программирования C. И главный класс это понятие C++. Главный класс это планирование (blueprint) для (создания) объектов.
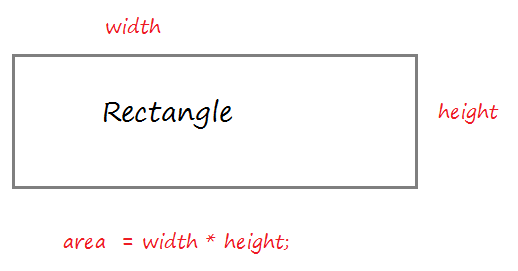
Чтобы было проще и понятней, я буду использовать класс для моделирования прямоугольника, с длиной и высотой, и с функцией для подсчета площади прямоугольника.
Чтобы было проще и понятней, я буду использовать класс для моделирования прямоугольника, с длиной и высотой, и с функцией для подсчета площади прямоугольника.
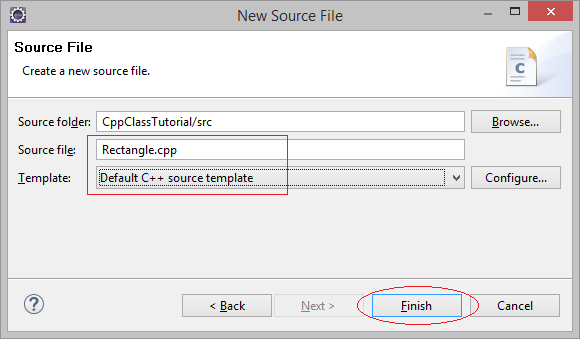
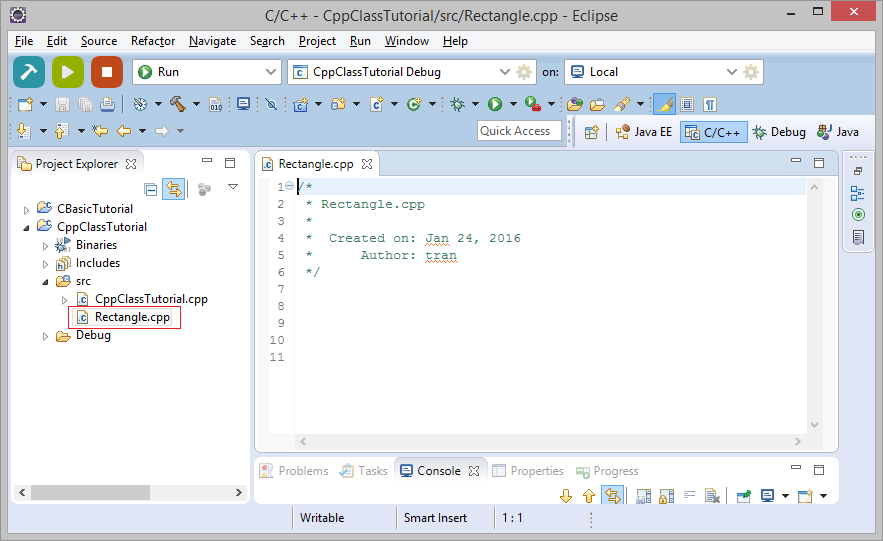
Создать ресурсный файл Rectangle.cpp:
Code:
Rectangle.cpp
#include <iostream>
using namespace std;
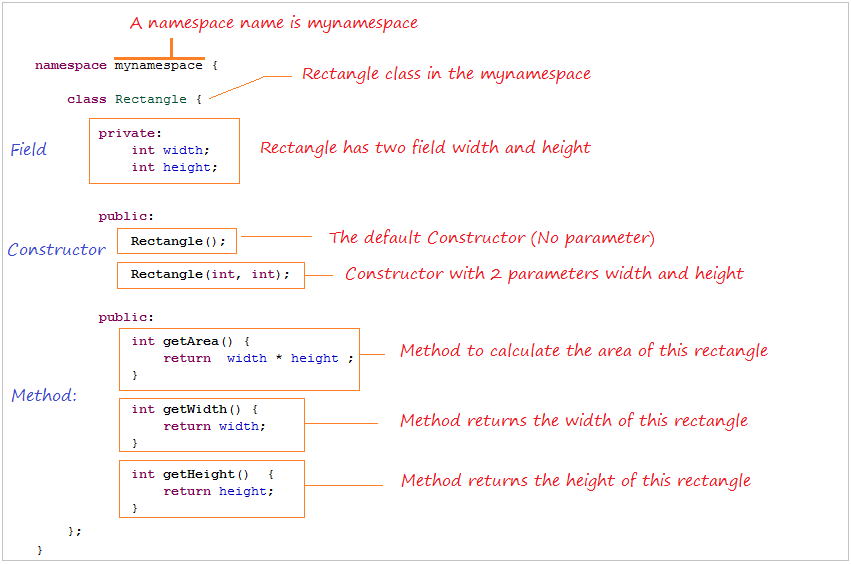
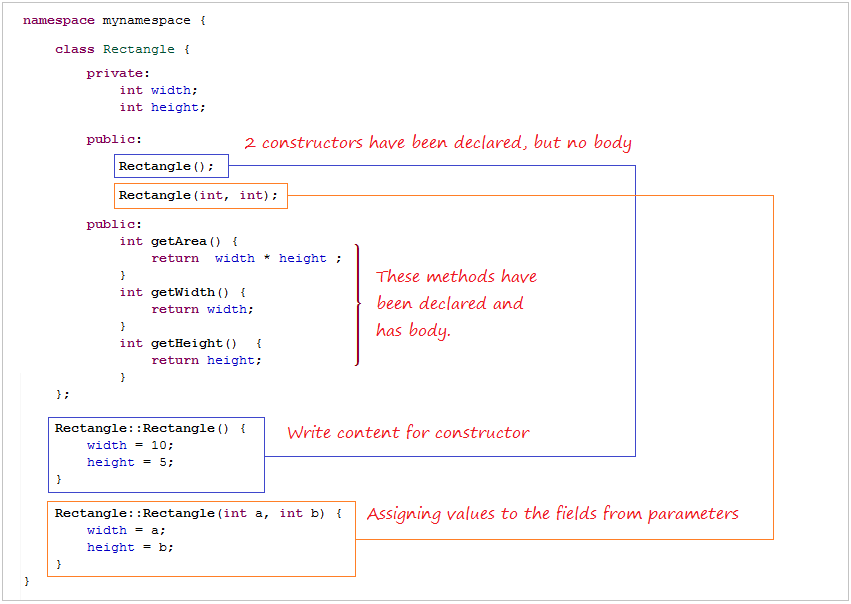
namespace mynamespace {
class Rectangle {
private:
int width;
int height;
public:
Rectangle();
Rectangle(int, int);
public:
int getArea() {
return width * height ;
}
int getWidth() {
return width;
}
int getHeight() {
return height;
}
};
Rectangle::Rectangle() {
width = 10;
height = 5;
}
Rectangle::Rectangle(int a, int b) {
width = a;
height = b;
}
}
// Declare use libraries located in the namespace 'mynamespace'.
// (Including Rectangle (Because it is in this namespace) ).
using namespace mynamespace;
int main() {
// Create a Rectangle 'rect1' from Constructor Rectangle(int, int).
// Value 5 is assigned to the width, the value 4 is assigned to the height.
Rectangle rect1(5, 4);
// Create a Rectangle 'rect2' from default Contructor Rectangle().
// width, height are assigned default values
Rectangle rect2;
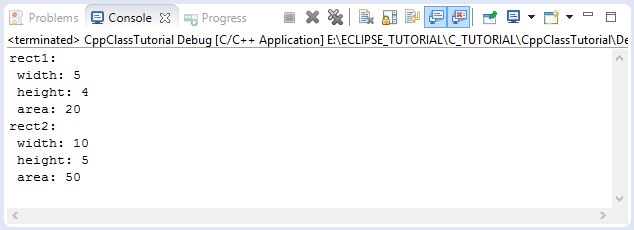
cout << "rect1:" << endl;
// Call method to get with
cout << " width: " << rect1.getWidth() << endl;
// Call method to get heght
cout << " height: " << rect1.getHeight() << endl;
// Call the method to calculate the area.
cout << " area: " << rect1.getArea() << endl;
cout << "rect2:" << endl;
cout << " width: " << rect2.getWidth() << endl;
cout << " height: " << rect2.getHeight() << endl;
cout << " area: " << rect2.getArea() << endl;
return 0;
}Примечание: Программа C/C++ позволяет только одну функцию main() во всем project, поэтому вам нужно поменять названия других функций main() в main_xxx() перед тем как запустить этот пример.
Запуск примера:
Примечание: Есть некоторые ключевые слова private, protected, public которые можно расставить перед полем (field), методом (method) или конструктором (constructor). Пока что мы не будем говорить о них, они являются access modifier (модификатор доступа) о которых я расскажу в следующей инструкции:TODO: LINK?
Теперь вам нужно посмотреть объяснения про класс, это очень важно.
6. Пример класса в C++ (2)
Посмотрим следующий пример класса в C++, который объявлен конструктором (Constructor) и методами (method) расположенными внутри содержания класса.
Circle.cpp
#include <iostream>
#include <math.h>
using namespace std;
namespace mynamespace {
class Circle {
private:
int radius;
public:
Circle() {
radius = 100;
}
// Constructor with one parameter.
// Assign value for radius field.
Circle(int r) {
radius = r;
}
public:
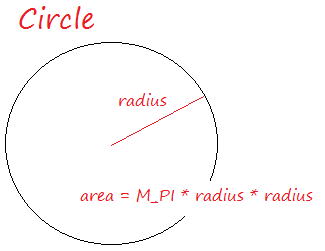
float getArea() {
// M_PI is a constant defined in <math.h>
return M_PI * radius* radius ;
}
// Method returns radius
// (The content of this method is written in another place)
int getRadius();
// Method to assign a new value for the radius
void setRadius(int r){
radius = r;
}
};
// Content of getRadius()
int Circle::getRadius() {
return radius;
}
}
// Declare to use the namespace 'mynamespace'.
using namespace mynamespace;
int main() {
// Create a Circle with radius = 5.
Circle circle1(5);
// Create a Circle with defalt radius (100).
Circle circle2;
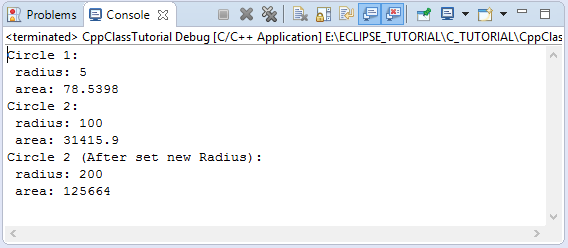
cout << "Circle 1:" << endl;
cout << " radius: " << circle1.getRadius() << endl;
cout << " area: " << circle1.getArea() << endl;
cout << "Circle 2:" << endl;
cout << " radius: " << circle2.getRadius() << endl;
cout << " area: " << circle2.getArea() << endl;
// Set new value for the radius.
circle2.setRadius(200);
cout << "Circle 2 (After set new Radius):" << endl;
cout << " radius: " << circle2.getRadius() << endl;
cout << " area: " << circle2.getArea() << endl;
return 0;
}Запуск примера:
7. Пример класса в C++ (3)
Когда вы создаете класс используя Wizard в Eclipse он создаст 2 файла ClassName.h и ClassName.cpp. В котором ClassName.h объявляет что ваш класс включает поля(field), методы (method) и конструкторы (constructor). А их содержание будет написано в ClassName.cpp.
Посмотрим пример, создайте класс Person в Eclipse с помощью Wizard.
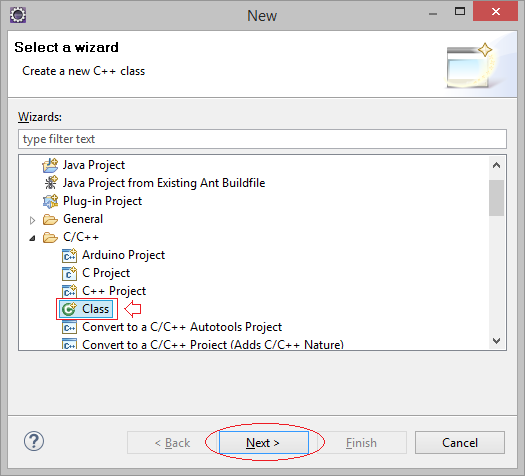
Создать класс с названием Person и находящийся в namespace (пространство имен): mynamespace.
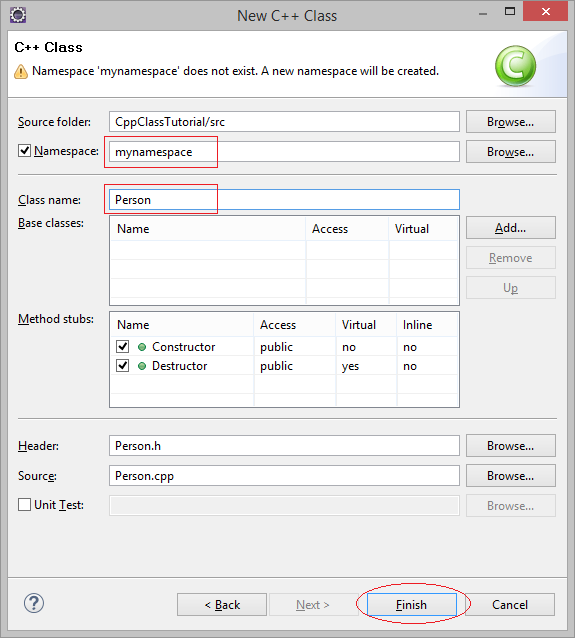
Класс Person создан, имеет 2 файла Person.cpp & Person.h

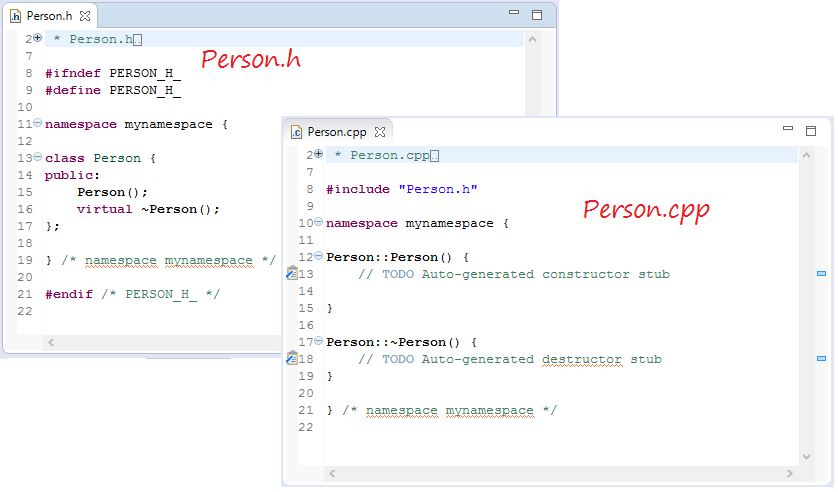
Теперь вам нужно изменить код Person.h & Person.cpp:
Person.h
#ifndef PERSON_H_
#define PERSON_H_

// Using string
#include <string>

// Using namespace std (to use string, cout,..)
using namespace std;

namespace mynamespace {


    class Person {

        private:
            // A field
            string name;

        public:
            // Default constructor
            Person();
            // Constructor with one parameter.
            Person(string);

            // Destructor.
            virtual ~Person();


        public:
            // Method return name of person.
            string getName();
            // Set new name for person.
            void setName(string);

    };

}

#endif
Person.cpp
// Inclure Person.h
#include "Person.h"
#include <iostream>
#include <string>

using namespace std;

namespace mynamespace {

    Person::Person() {
        // Default name.
        name = "Anonymous";
    }

    Person::Person(string name) {
        // Assign value to field of Person.
        // Using this -> name to refers to name field of Person.
        // (To avoid confusion with the parameter 'name').
        this-> name = name;
    }

    // Destructor, same name with name of class and has no parameters.
    Person::~Person() {
        cout<< "Destructor called" <<endl ;
    }


    // Content of method getName().
    string Person::getName()  {
        return this-> name;
    }

    // Set new name for person.
    void Person::setName(string newName)  {
        // Assign new name.
        name = newName;
    }

}
Destructor (Методы уничтожения объекта):Когда объекты созданы, и больше не используются, они будут удалены из памяти компьютера, сразу перед удалением вызывается метод уничтожения (Destructor). Обычно, когда вы создаете объект и используете другие ресурсы в системе, например открываете файл для чтения вы можете освободить файл в деструкторе объекта.
Вы можете использовать класс Person в другом исходном файле.
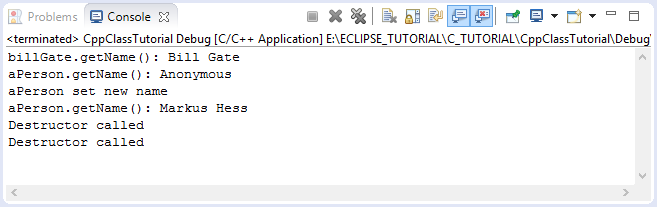
PersonTest.cpp
#include "Person.h"
#include <iostream>
#include <string>

using namespace std;


using namespace mynamespace ;

int main() {

    // Create a Person object.
    Person billGate("Bill Gate");

    cout << "billGate.getName(): " << billGate.getName() << endl;

    // Create a Person from default contructor.

    Person aPerson ;

    cout << "aPerson.getName(): "<< aPerson.getName() << endl;

    cout << "aPerson set new name" << endl;

    // Set new name for aPerson.
    aPerson.setName("Markus Hess");

    cout << "aPerson.getName(): " << aPerson.getName() << endl;

    return 0;


}
Запуск примера: