Руководство Java OSGi для начинающих
1. Введение
Данная статья основана на:
- Eclipse 4.4 (LUNA)
Шаги, которые будут пройдены в данной иснтрукции

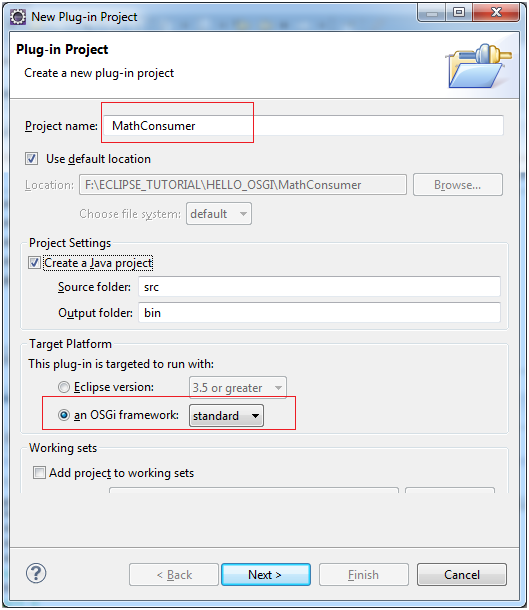
2. Создать OSGi "MathConsumer"
Создать Project MathConsumer
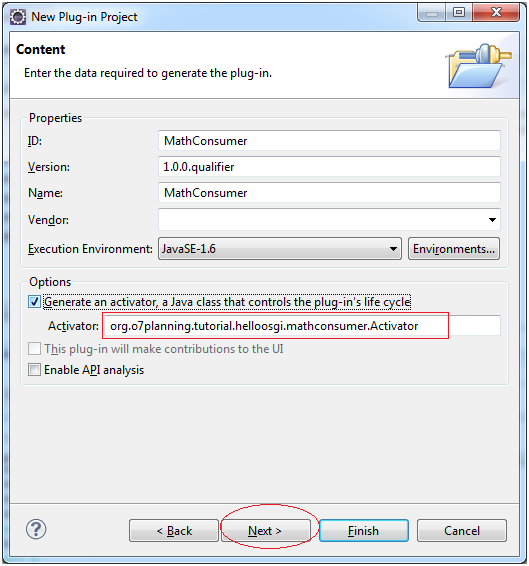
- org.o7planning.tutorial.helloosgi.mathconsumer.Activator
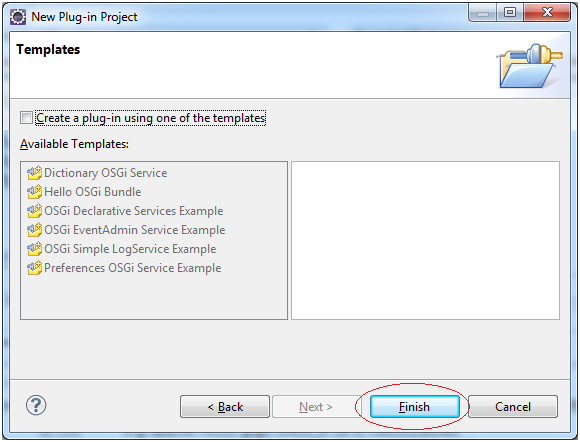
Проект MathConsumer создан.
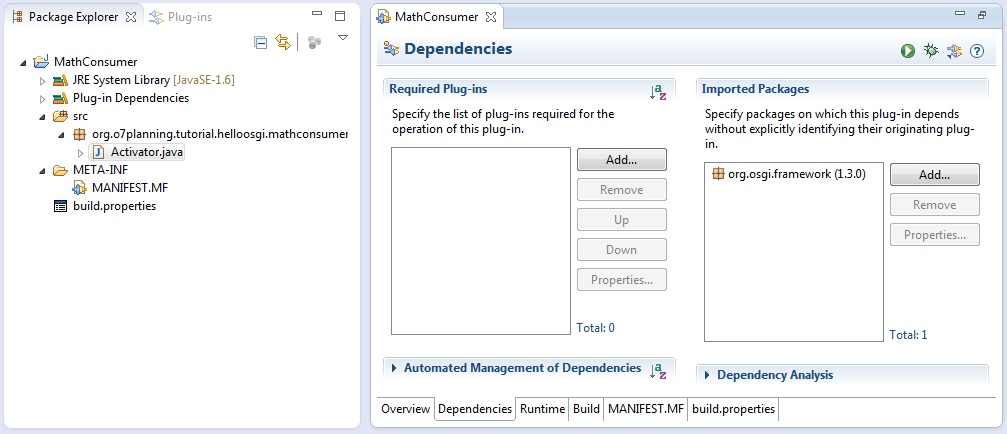
Откройте класс Activator, чтобы исправить код:
Activator.java
package org.o7planning.tutorial.helloosgi.mathconsumer;
import org.osgi.framework.BundleActivator;
import org.osgi.framework.BundleContext;
public class Activator implements BundleActivator {
private static BundleContext context;
static BundleContext getContext() {
return context;
}
public void start(BundleContext bundleContext) throws Exception {
Activator.context = bundleContext;
System.out.println("MathConsumer Starting...");
System.out.println("MathConsumer Started");
}
public void stop(BundleContext bundleContext) throws Exception {
Activator.context = null;
System.out.println("MathConsumer Stopped");
}
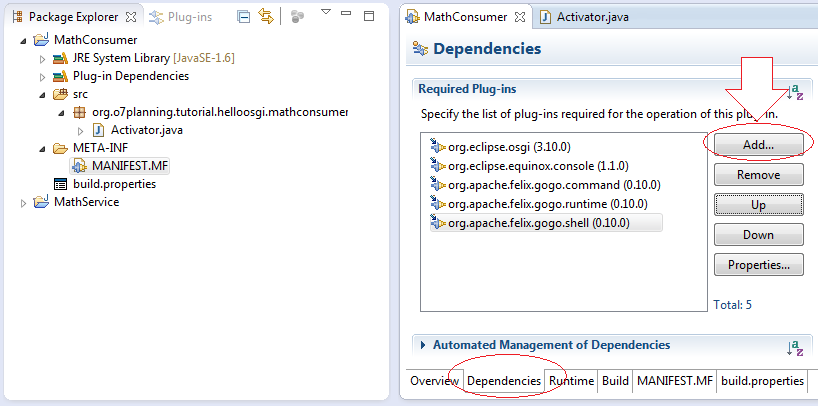
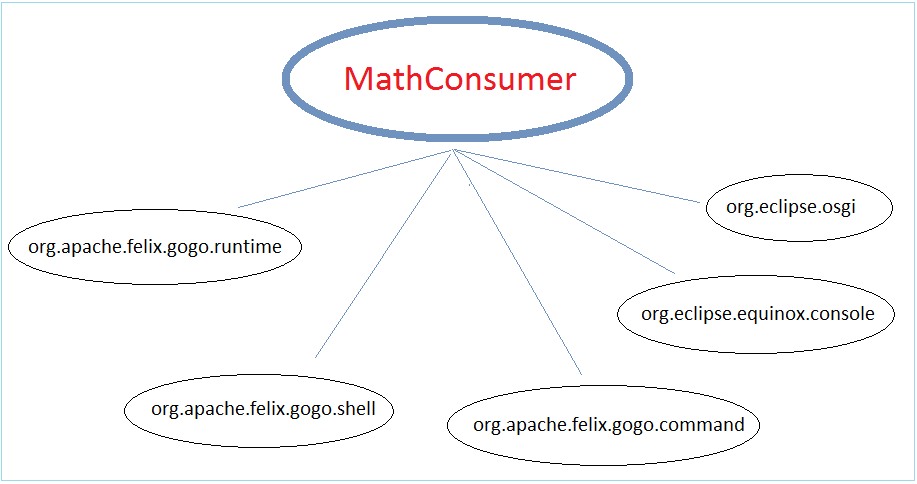
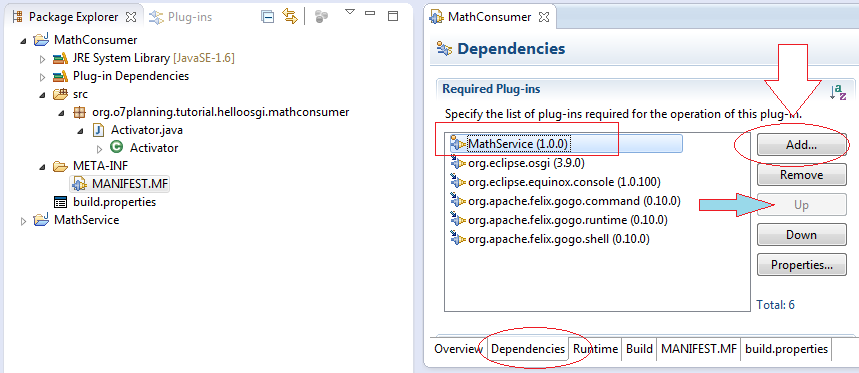
}Конфигурация зависимые bundle для MathConsumer
MathConsumer - это OSGI( Bundle) . Теперь мы объявим MathConsumer используя другой Bundle, в целях иметь возможность запустить MathConsumer позже
- org.eclipse.osgi
- org.eclipse.equinox.console
- org.apache.felix.gogo.command
- org.apache.felix.gogo.runtime
- org.apache.felix.gogo.shell
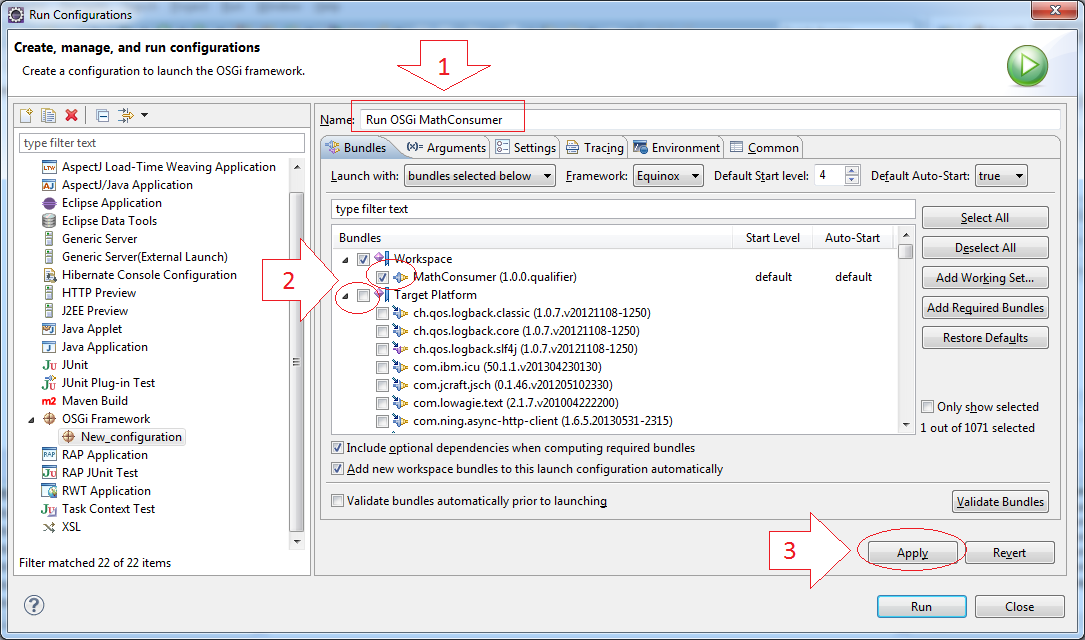
Конфигурация Eclipse для запуска MathConsumer
Далее мы конфигурируем, чтобы запустить напрямую MathConsumer в Eclipse
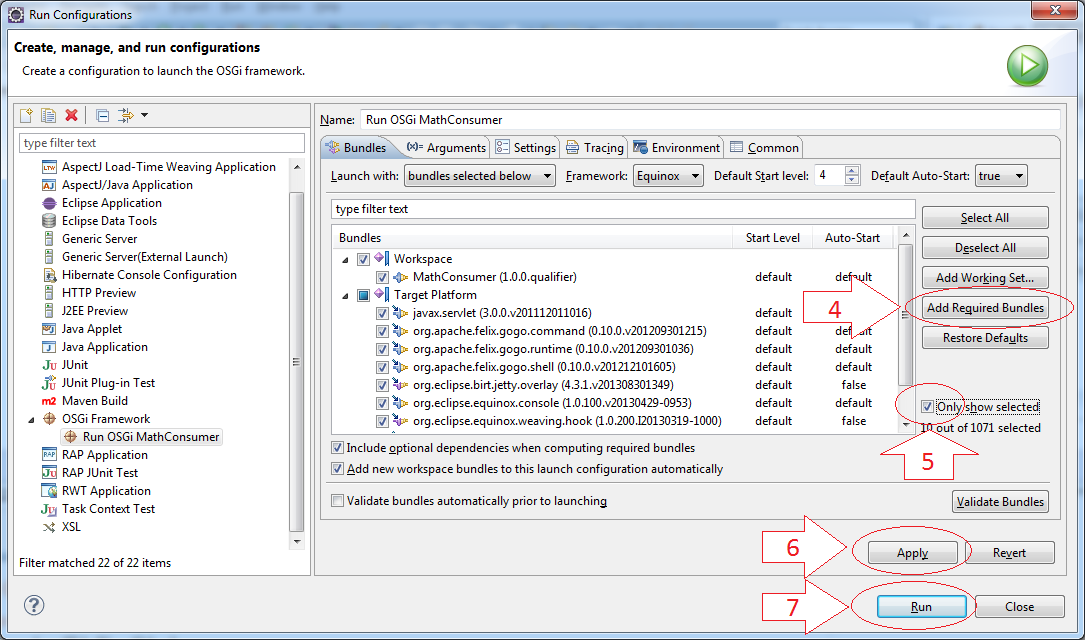
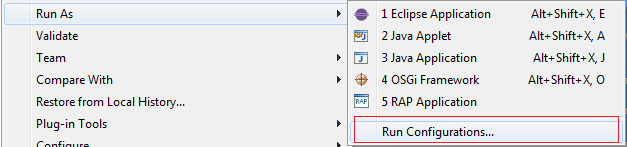
Щелкните правой кнопкой мыши в проект MathService и выберите "Run As / Run Configuration .."

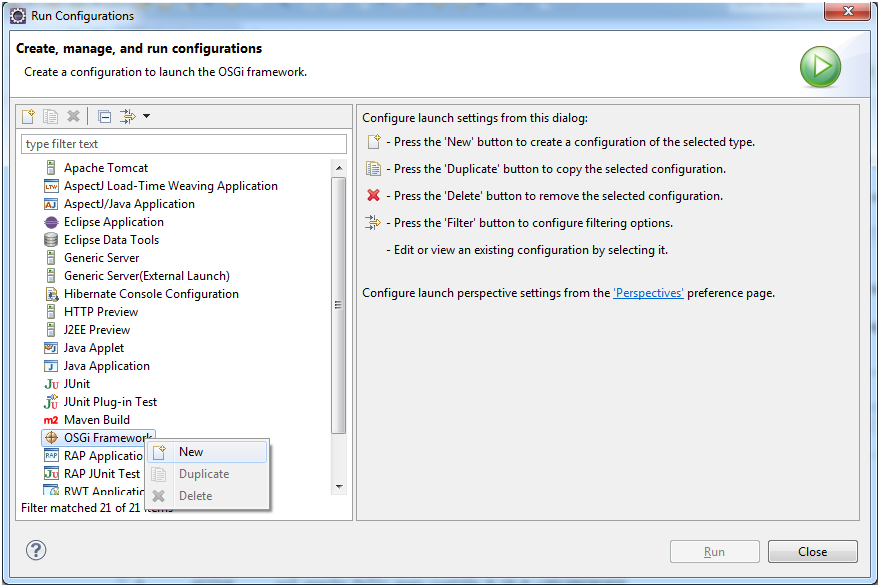
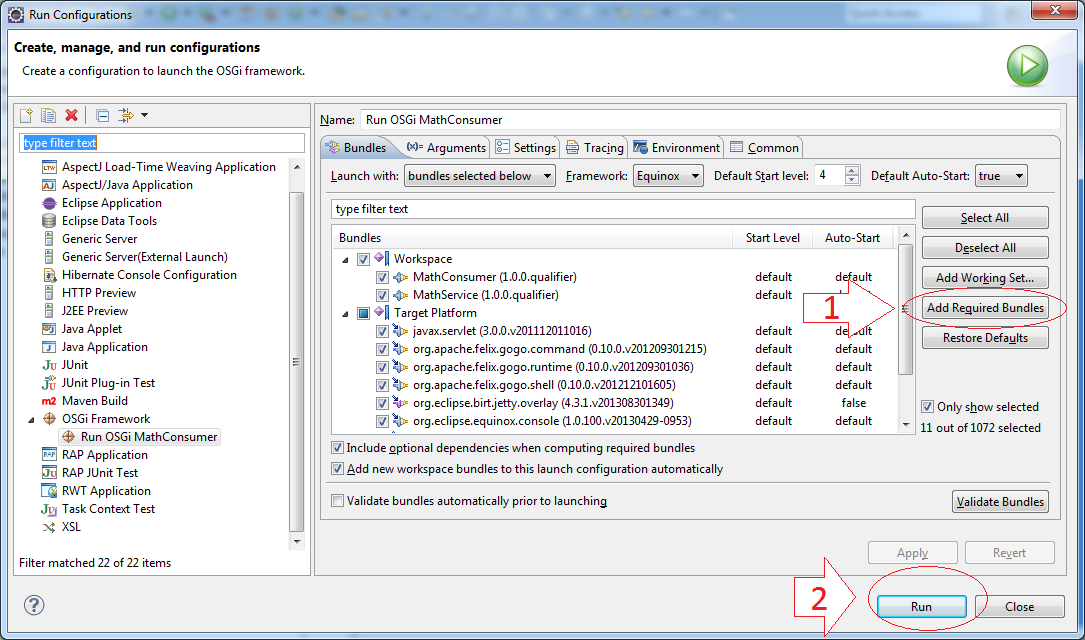
Введите имя:
- Run OSGi MathConsumer
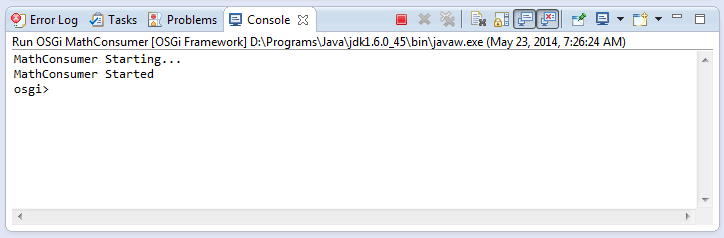
Запуск MathConsumer
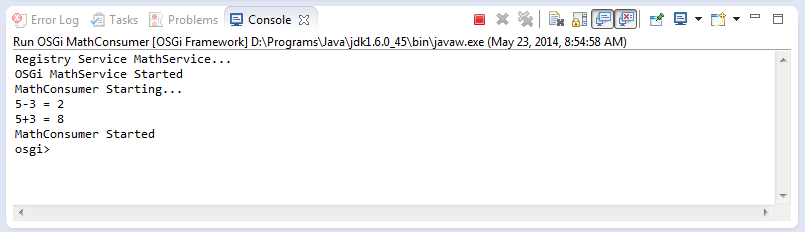
Это результат запуска OSGi MathConsumer
Используйте команду ss, чтобы увидеть какой OSGi работает ,и их статус.
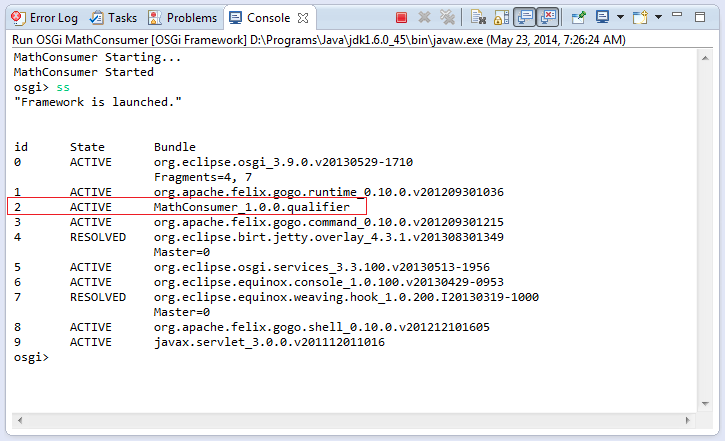
В иллюстрации мы видим ID OSGi MathConsumer это 2, используйте команду "stop", чтобы остановить этот Bundle.
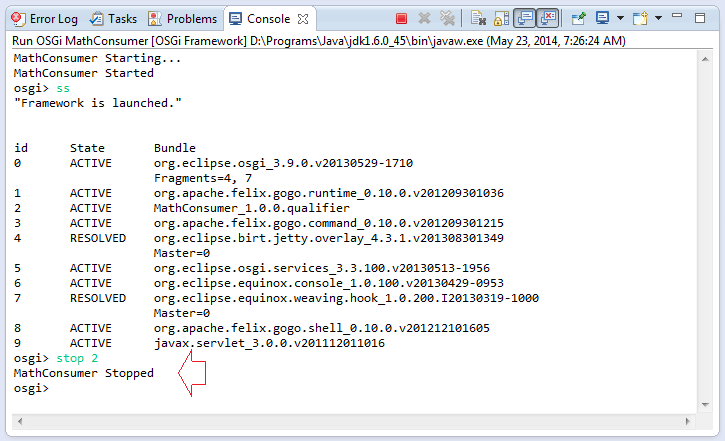
И использовать "start", чтобы снова запустить этот OSGi.

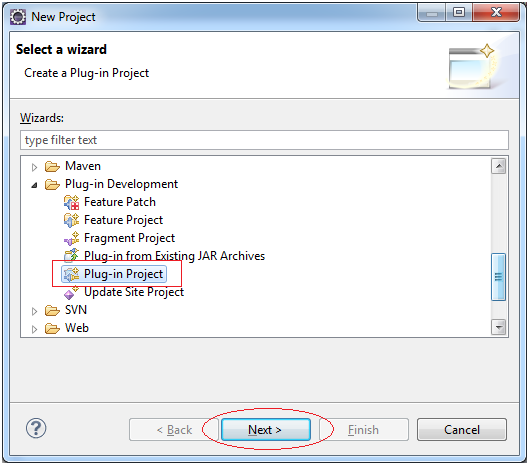
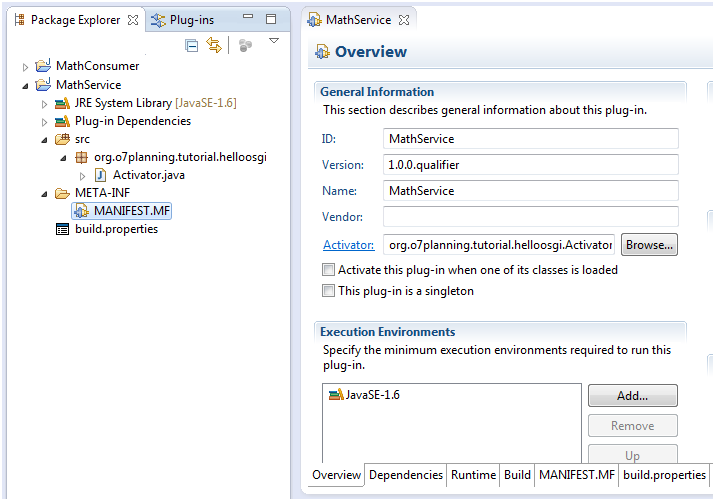
3. Создать OSGi "MathService"
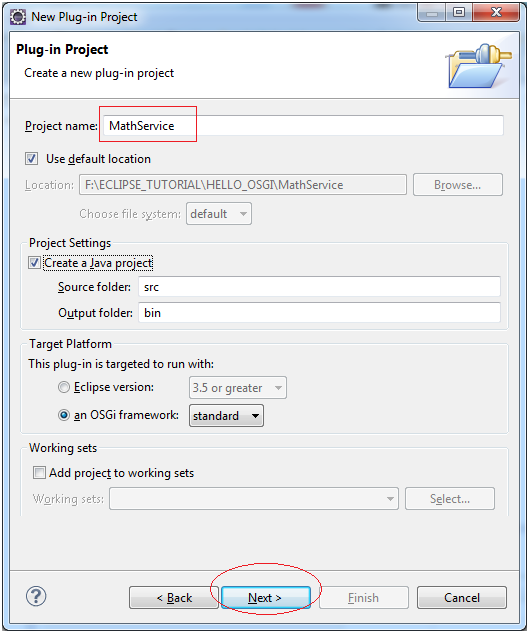
Создать Project "MathService"
В Eclipse выберите:
- File/New/Other
Выберите вид OSGi это Standard
- MathService
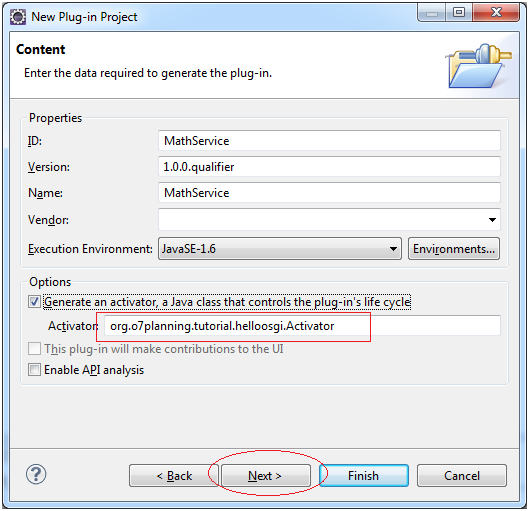
- org.o7planning.tutorial.helloosgi.Activator
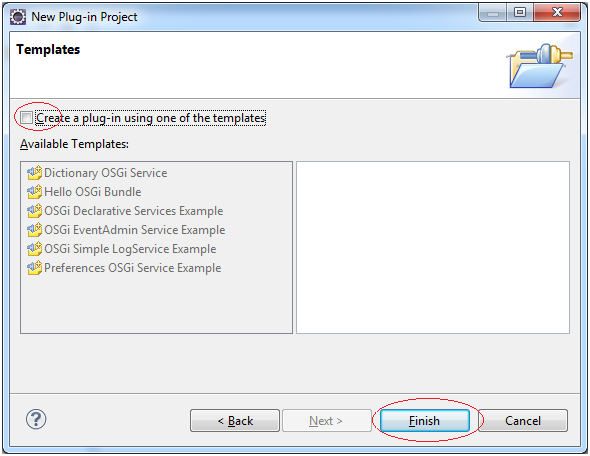
Это изображение созданного проекта:
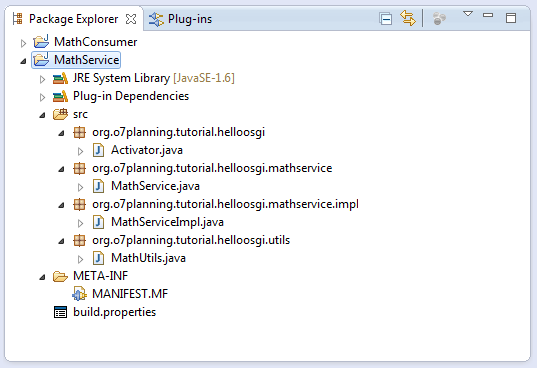
Code Project MathService & и зарегистрировать сервис MathService
Мы добавим некоторые классы, чтобы получить полный проект:
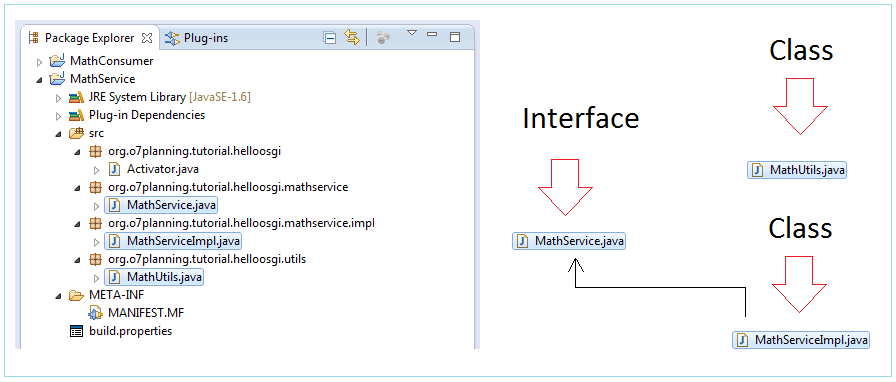
MathService.java
package org.o7planning.tutorial.helloosgi.mathservice;

public interface MathService {

   public int sum(int a, int b);

}
MathServiceImpl.java
package org.o7planning.tutorial.helloosgi.mathservice.impl;

import org.o7planning.tutorial.helloosgi.mathservice.MathService;

public class MathServiceImpl implements MathService {

   @Override
   public int sum(int a, int b) {
       return a+ b;
   }

}
MathUtils.java
package org.o7planning.tutorial.helloosgi.utils;

public class MathUtils {


   public static int minus(int a, int b)  {
       return a- b;
   }
}
И это полная картина отношений созданных классов.
Зарегистрировать услугу MathService чтобы другие OSGi могли использовать. Это выполняется в Activator в OSGi MathService.
Activator.java
package org.o7planning.tutorial.helloosgi;
import org.o7planning.tutorial.helloosgi.mathservice.MathService;
import org.o7planning.tutorial.helloosgi.mathservice.impl.MathServiceImpl;
import org.osgi.framework.BundleActivator;
import org.osgi.framework.BundleContext;
public class Activator implements BundleActivator {
private static BundleContext context;
static BundleContext getContext() {
return context;
}
public void start(BundleContext bundleContext) throws Exception {
Activator.context = bundleContext;
System.out.println("Registry Service MathService...");
this.registryMathService();
System.out.println("OSGi MathService Started");
}
private void registryMathService() {
MathService service = new MathServiceImpl();
context.registerService(MathService.class, service, null);
}
public void stop(BundleContext bundleContext) throws Exception {
Activator.context = null;
System.out.println("OSGi MathService Stopped!");
}
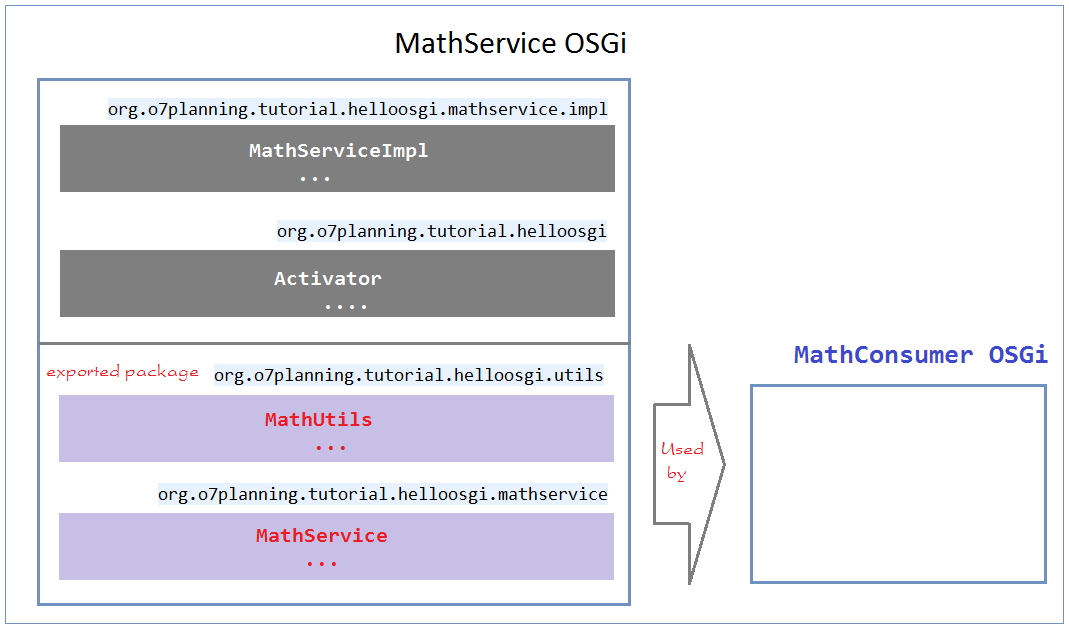
}Конфигурация OSGi MathService и объясните
Конфигурация для экспорта (export) 2 packages org.o7planning.tutorial.helloosgi.utils и org.o7planning.tutorial.helloosgi.mathservice.
OSGi, как закрытый ящик, другие OSGi могут использовать только class/interface этого OSGi, если он находится в package который экспортируется .
OSGi, как закрытый ящик, другие OSGi могут использовать только class/interface этого OSGi, если он находится в package который экспортируется .
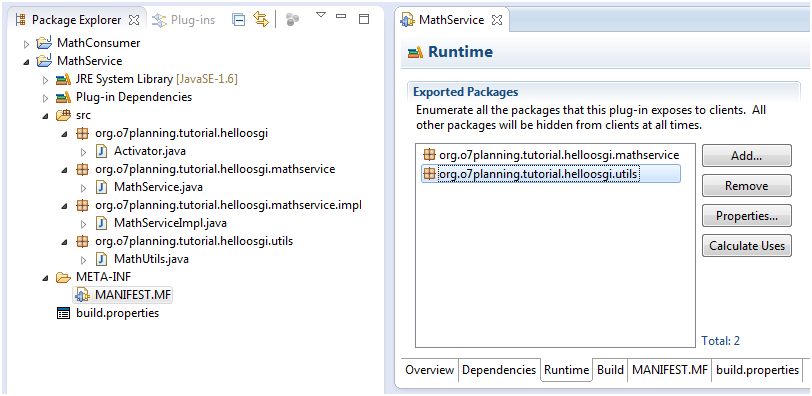
На рисунке ниже показано как OSGi MathService экспортирует 2 package
- org.o7planning.tutorial.helloosgi.mathservice
- org.o7planning.tutorial.helloosgi.utils
OSGi MathConsumer может использовать только class/interface в package, который MathService экспортирует.
4. Конфигурация MathConsumer используя MathService
Далее мы объявим чтобы MathConsumer мог использовать MathService.
Изменить class Activator
Activator.java
package org.o7planning.tutorial.helloosgi.mathconsumer;

import org.o7planning.tutorial.helloosgi.mathservice.MathService;
import org.o7planning.tutorial.helloosgi.utils.MathUtils;
import org.osgi.framework.BundleActivator;
import org.osgi.framework.BundleContext;
import org.osgi.framework.ServiceReference;

public class Activator implements BundleActivator {

    private static BundleContext context;

    static BundleContext getContext() {
        return context;
    }

    public void start(BundleContext bundleContext) throws Exception {
        Activator.context = bundleContext;
        System.out.println("MathConsumer Starting...");

        System.out.println("5-3 = " + MathUtils.minus(5, 3));

        //
        ServiceReference<?> serviceReference = context
                .getServiceReference(MathService.class);
        MathService service = (MathService) context
                .getService(serviceReference);

        System.out.println("5+3 = " + service.sum(5, 3));

        System.out.println("MathConsumer Started");
    }

    public void stop(BundleContext bundleContext) throws Exception {
        Activator.context = null;
        System.out.println("MathConsumer Stopped");
    }

}
Переконфигурировать для запуска OSGi MathConsumer
Щелкните правой кнопкой мыши в проект MathConsumer выберите "Run As/Run Configuration."
Технология Eclipse
- Установите Tycho для Eclipse
- Руководство Java OSGi для начинающих
- Создайте проект Java OSGi с Maven и Tycho
- Установите WindowBuilder для Eclipse
- Какую платформу я должен выбрать для разработки приложений Java Desktop?
- Программирование приложения Java Desktop с использованием SWT
- Руководство Eclipse JFace
- Установить Eclipse RAP Target Platform
- Установите RAP e4 Tooling для Eclipse
- Создать Eclipse RAP Widget из ClientScripting-based widget
- Руководство Eclipse RCP 4 для начинающих - e4 Workbench Application
- Установите RAP Tools для Eclipse
- Руководство Eclipse RAP для начинающих - приложение e4 Workbench
Show More