Руководство CKEditor (CKEditor 4)

2. Что такое CKEditor?
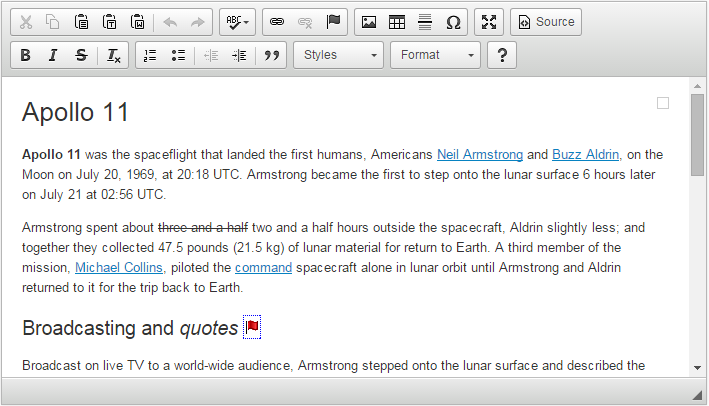
CKEditor это готовый для использования текстовый рекдактор HTML, созданный для упрощения создания содержания веб страниц. Это WYSIWYG редактор который предоставляет функции редактирования текста непосредственно вашим веб страницам.
CKEditor это приложение с открытым исходным кодом, то есть оно может быть измнено по вашему желанию. Его полезность приходит от активного общества, которое не прекращает развитие приложений с бесплатными add-ons и прозрачным процессом развития (transparent development process).
3. Download CKEditor
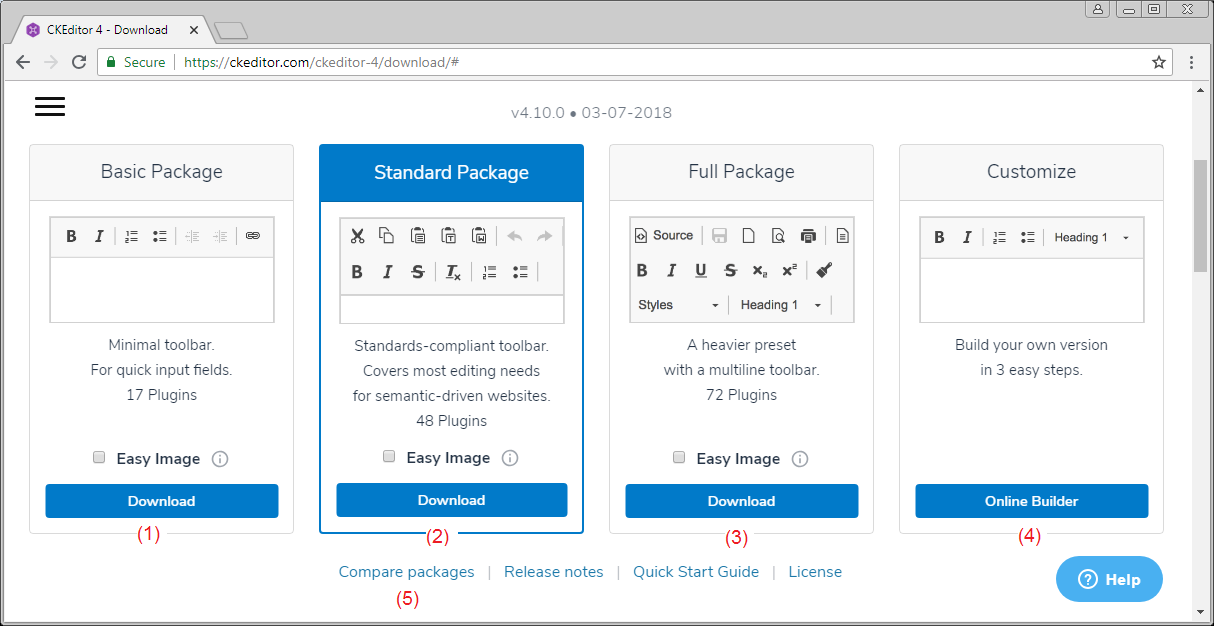
- Basic Package:
- Это стандартный пакте, включает стандартные функции CKEditor, и это компактный пакет.
- Standard Package:
- Это стандартный пакет, который имеет примерно 48 plugin.
- Full Package:
- Это полный пакет, со всеми plugin в CKEditor. Это самый тяжелый пакет.
- Customize CKEditor Package:
- Это кастомизированный пакет, вы можете выбрать нужный Plugin для скачивания.
Вы можете нажать на ссылку (5) чтобы посмотреть разницу между пакетами.
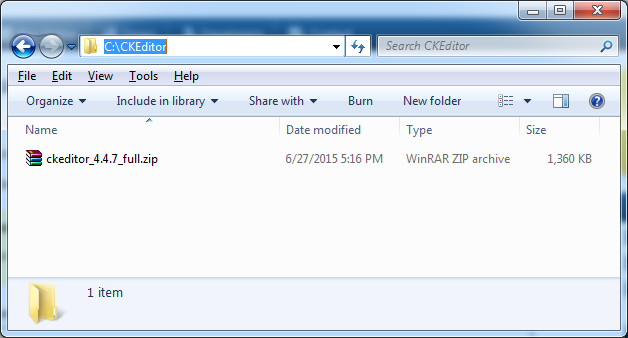
Здесь я скачаю полный пакет plugin:
Результат скачивания:
Извлечь:
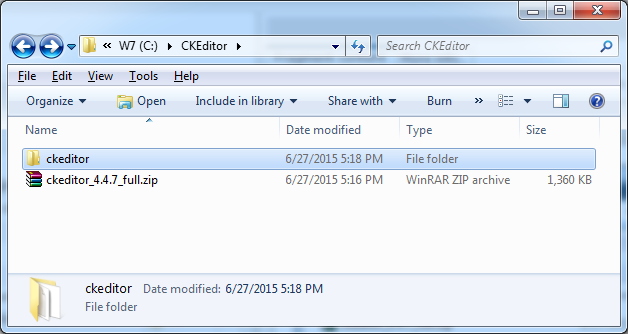
Можете посмотреть примеры CKEditor в папке samples:
4. Базовые примеры:
Все примеры данной статьи содержатся в папке samples в CKEditor который вы скачали. Но я попытаюсь сделать это легче чтобы вам далось легче.
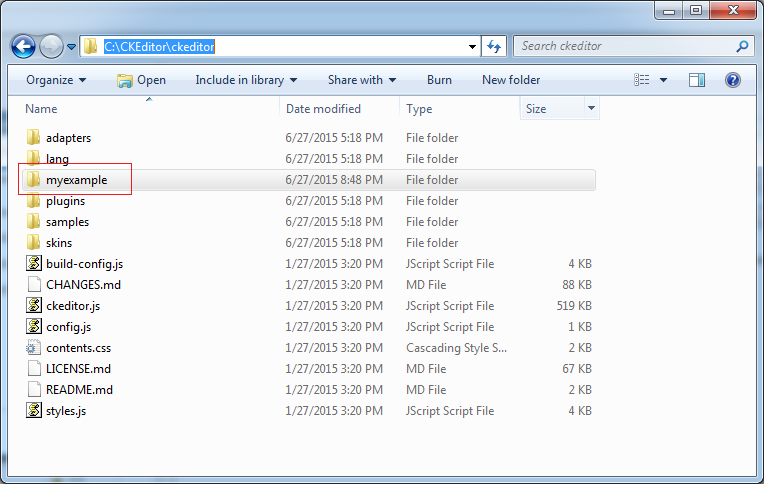
Создать папку myexamples, примеры данной статьи будут находиться в этой папке.
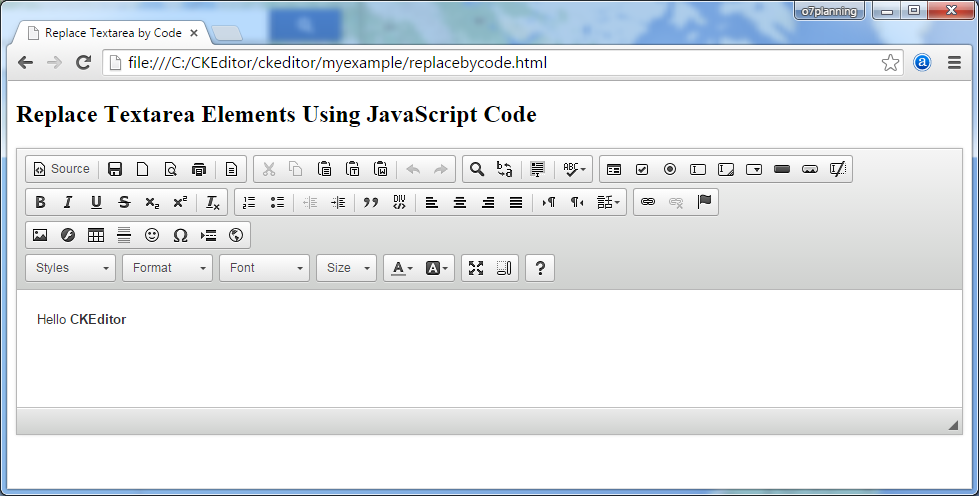
Заменить элементы Textarea используя JavaScript
Простой пример использование CKEditor.replace(..) чтобы заменить <textarea> через CKEditor.
replacebycode.html
<!DOCTYPE html>
<html>
<head>
    <meta charset="utf-8">
    <title>Replace Textarea by Code</title>

    <!-- (1) : Declaration for CKEditor library -->
    <script src="../ckeditor.js"></script>

</head>
<body>
    <h2>Replace Textarea Elements Using JavaScript Code</h2>

    <form action="" method="post">

        <!-- (2): textarea will replace by CKEditor -->
        <textarea id="editor1" name="editor1" cols="80" rows="10">
            <p>Hello <strong>CKEditor</strong></p>
        </textarea>

         <!-- (3): Javascript code to replace textarea with id='editor1' by CKEditor -->
        <script>

            CKEDITOR.replace( 'editor1' );

        </script>

    </form>
</body>
</html>
Смотрите пример:
Результаты запуска примера:
Заменить элементы textarea классом name
С <textarea> имеющие атрибут name, и class ="ckeditor" будет автоматически заменен CKEditor-ом.
<texarea name = "editor1" class="ckeditor"> </texarea>


<textarea name = "editor2" class="ckeditor"> Text </textarea>
replacebyclass.html
<!DOCTYPE html>
<html>
<head>
   <meta charset="utf-8">
   <title>Replace Textareas by Class Name</title>

   <script src="../ckeditor.js"></script>

</head>
<body>

   <h1>Replace Textarea Elements by Class Name</h1>

   <form action="" method="post">

       <textarea class="ckeditor" name="editor1" cols="80" rows="10">

           <p>Hello <strong>CKEditor</strong></p>

       </textarea>

    </form>

</body>
</html>
Запуск примера:
Создать CKEditor с jQuery
Пример создания CKEditor используя JQuery.
jquery.html
<!DOCTYPE html>
<html>
<head>
<meta charset="utf-8">
<title>jQuery Adapter — CKEditor Sample</title>
<script src="http://code.jquery.com/jquery-1.11.0.min.js"></script>
<script src="../ckeditor.js"></script>
<script src="../adapters/jquery.js"></script>
<script>
$( document ).ready( function() {
$( '#editor1' ).ckeditor();
} );
function setValue() {
$( '#editor1' ).val( $( 'input#val' ).val() );
}
</script>
</head>
<body>
<h1 class="samples">Create Editors with jQuery</h1>
<form action="" method="post">
<textarea id="editor1" name="editor1" cols="80" rows="10">
<p>Hello <strong>CKEditor</strong></p>
</textarea>
<input type="text" id="val" value="I'm using jQuery val()!" size="30">
<input onclick="setValue();" type="button" value="Set value">
</form>
</body>
</html>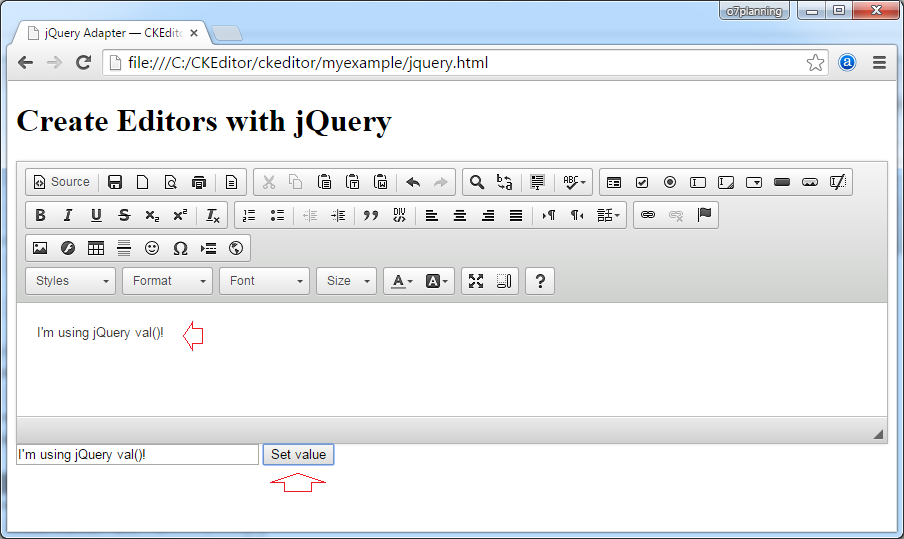
Запуск примера:
5. Базовая кастомизация
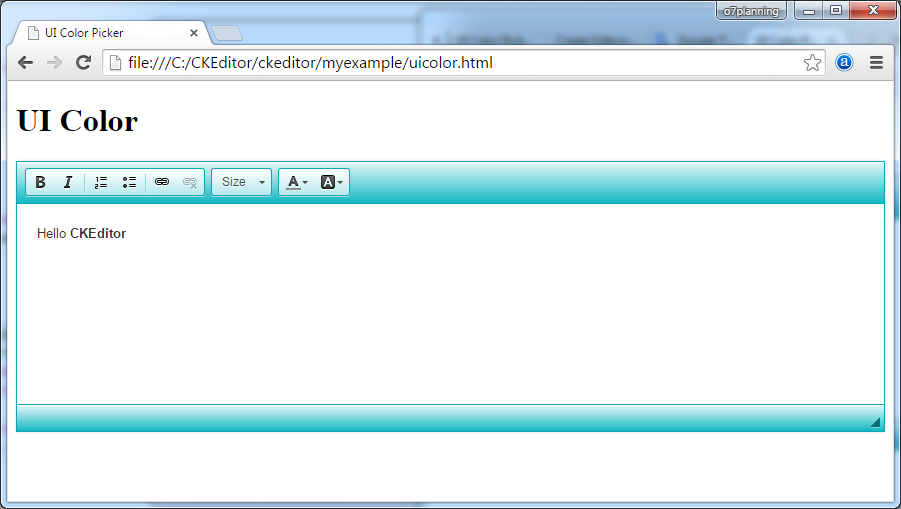
Изменение цвета интерфейса
CKEDITOR.replace( 'textarea_id', {
    uiColor: '#14B8C4'
});
uicolor.html
<!DOCTYPE html>
<html>
<head>
   <meta charset="utf-8">
   <title>UI Color Picker</title>

   <script src="../ckeditor.js"></script>

</head>
<body>
   <h1>UI Color</h1>

   <textarea id="editor1" name="editor1" cols="80" rows="10">
       <p>Hello <strong>CKEditor</strong></p>
   </textarea>

   <script>

       // Replace the <textarea id="editor1"> with an CKEditor
       // instance, using default configurations.
       CKEDITOR.replace( 'editor1', {
           uiColor: '#14B8C4',
           toolbar: [
               [ 'Bold', 'Italic', '-', 'NumberedList', 'BulletedList', '-', 'Link', 'Unlink' ],
               [ 'FontSize', 'TextColor', 'BGColor' ]
           ]
       });

   </script>
</body>
</html>
Try it:
Смотрите так же:
Изменить язык
uilanguages.html
<!DOCTYPE html>
<html>
 <head>
    <meta charset="utf-8">
    <title>User Interface Globalization</title>

    <script src="../ckeditor.js"></script>

 </head>
 <body>

    <h1>User Interface Languages</h1>
    <form action="" method="post">

       <select onchange="createEditor( this.value );" id="languages">
          <option value="en-gb">English (United Kingdom)</option>
          <option value="vi">Vietnamese</option>
          <option value="zh-cn">Chinese Simplified</option>
          <option value="zh">Chinese Traditional</option>
       </select>

       <textarea id="editor1" name="editor1"  cols="80" rows="10">
             <p>Hello <strong>CKEditor</strong></p>
       </textarea>

       <script>
          var editor;

          function createEditor( languageCode ) {
              if ( editor )
                  editor.destroy();

              // Replace the <textarea id="editor1"> with an CKEditor
              // instance, using default configurations.
              editor = CKEDITOR.replace( 'editor1', {
                  language: languageCode,

                  on: {
                      instanceReady: function() {
                          // Wait for the editor to be ready to set
                          // the language combo.
                          var languages = document.getElementById( 'languages' );
                          languages.value = this.langCode;
                          languages.disabled = false;
                      }
                  }
              });
          }

          // At page startup, load the default language:
          createEditor( '' );

       </script>

    </form>
 </body>
</html>
Заметка: Список языковых кодов и названий языков вы можете посмотреть в:
- <CKEditor_Home>/samples/assets/uilanguages/languages.js
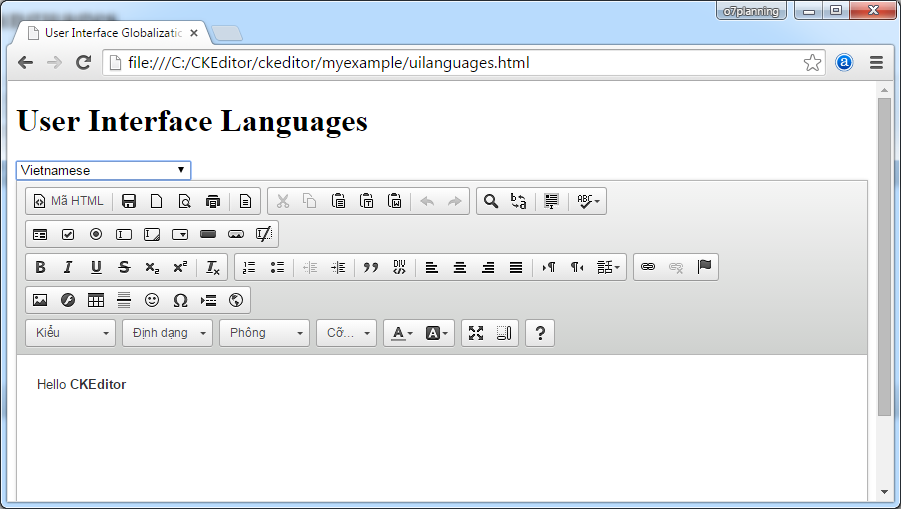
Запуск примера:
6. Встроенное редактирование (Inline Editing)
Создание сложно встроенного редактора
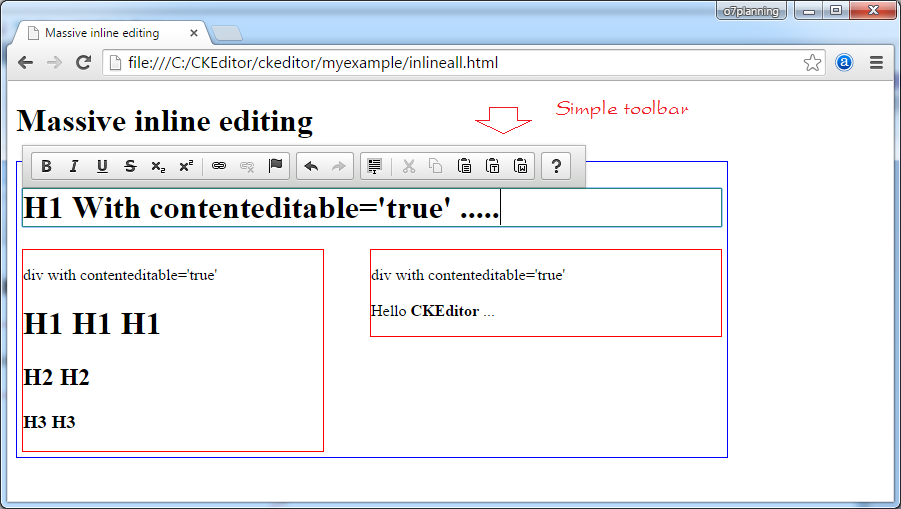
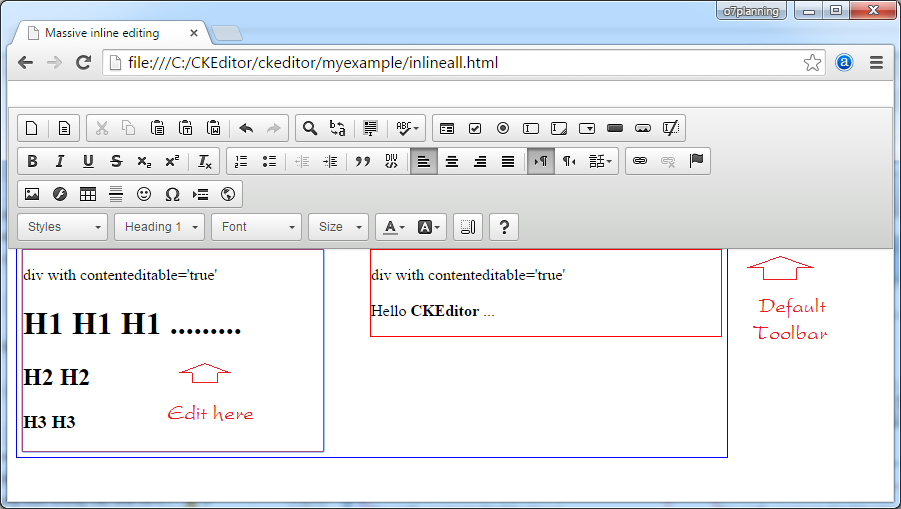
Данный пример показывает inline редактирование - объект CKEditor будет автоматически создан из элементов (element) имеющие атрибут contenteditable = 'true'.
Вы можете менять содержание внутри элемента HTML который имеет атрибут contenteditable='true'. И появится панель инструментов при изменении:
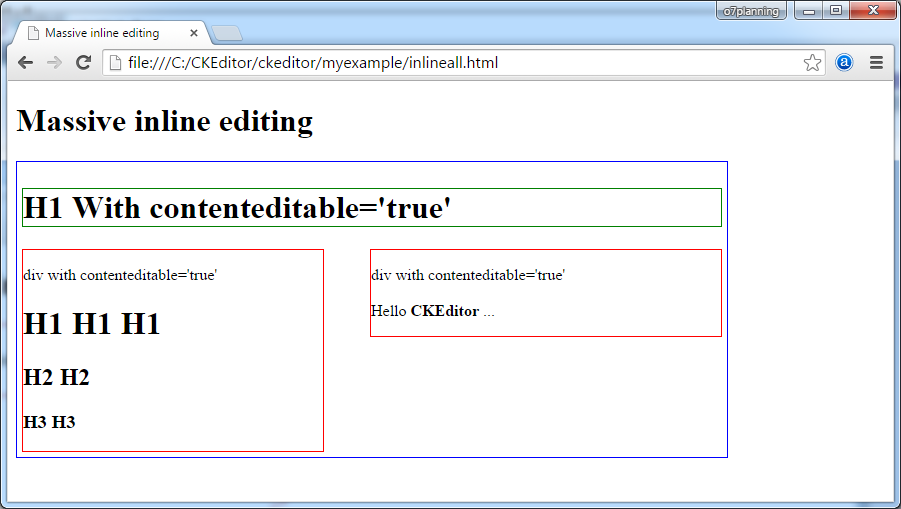
- Если h1, h2, h3 или таг с id = taglist, và có contenteditable = 'true', то панель инструмент просто показывает (Удалены plugin colorbutton, find, flash, fonts,... )
- Напротив панель инструментов показывается по умолчанию.
Иллюстрация запуска примера:
inlineall.html
<!DOCTYPE html>
<html>
  <head>
     <meta charset="utf-8">
     <title>Massive inline editing</title>
     <script src="../ckeditor.js"></script>

     <script>

        // The "instanceCreated" event is fired for every editor instance created.
        CKEDITOR.on( 'instanceCreated', function( event ) {
            var editor = event.editor,
                element = editor.element;

            // Customize editors for headers and tag list.
            // If element (h1, h2, h3 or id='taglist') and contenteditable="true"
            // These editors don't need features like smileys, templates, iframes etc.

            if ( element.is( 'h1', 'h2', 'h3' ) || element.getAttribute( 'id' ) == 'taglist' ) {
                // Customize the editor configurations on "configLoaded" event,
                // which is fired after the configuration file loading and
                // execution. This makes it possible to change the
                // configurations before the editor initialization takes place.

                editor.on( 'configLoaded', function() {

                    // Remove unnecessary plugins to make the editor simpler.
                    editor.config.removePlugins = 'colorbutton,find,flash,font,' +
                        'forms,iframe,image,newpage,removeformat,' +
                        'smiley,specialchar,stylescombo,templates';

                    // Rearrange the layout of the toolbar.
                    editor.config.toolbarGroups = [
                        { name: 'editing',        groups: [ 'basicstyles', 'links' ] },
                        { name: 'undo' },
                        { name: 'clipboard',    groups: [ 'selection', 'clipboard' ] },
                        { name: 'about' }
                    ];
                });
            }
        });

     </script>
  </head>
  <body>
     <h1>Massive inline editing</h1>

     <div id="container" style="border: 1px solid blue;width: 700px; display:inline-block;padding:5px;">

          <h1 contenteditable="true" style="border:1px solid green;">
              H1 With contenteditable='true'
          </h1>

          <div style="border: 1px solid red; float: left;width: 300px;" contenteditable="true">
             div with contenteditable='true'
             <h1>H1 H1 H1</h1>
             <h2>H2 H2</h2>
             <h3>H3 H3</h3>
          </div>

          <div style="border: 1px solid red; float: right;width: 350px;" contenteditable="true">
             div with contenteditable='true' <br><br>
             Hello <b>CKEditor</b> ...
          </div>

      </div>

  </body>
</html>
Запуск примера:
Ковертировать элемент в встроенный редактор используя код
inlinebycode.html
<!DOCTYPE html>
<html>
<head>
<meta charset="utf-8">
<title>Inline Editing by Code — CKEditor Sample</title>
<script src="../ckeditor.js"></script>
<style>
#editable
{
padding: 10px;
float: left;
}
</style>
</head>
<body>
<h1>Inline Editing by Code</h1>
<div id="editable" contenteditable="true" style="border:1px solid red;">
<p>Hello <strong>CKEditor</strong></p>
</div>
<script>
// We need to turn off the automatic editor creation first.
CKEDITOR.disableAutoInline = true;
var editor = CKEDITOR.inline( 'editable' );
</script>
</body>
</html>Заменить textarea встроенным редактором
inlinetextarea.html
<!DOCTYPE html>
<html>
   <head>
      <meta charset="utf-8">
      <title>Replace Textarea with Inline Editor</title>

      <script src="../ckeditor.js"></script>

      <style>
         /* Style the CKEditor element to look like a textfield */
         .cke_textarea_inline
         {
         padding: 10px;
         height: 200px;
         overflow: auto;
         border: 1px solid gray;
         -webkit-appearance: textfield;
         }
      </style>

   </head>
   <body>
      <h1>Replace Textarea with Inline Editor</h1>


      <textarea name="article-body" style="height: 200px">
               <p>Hello <strong>CKEditor</strong></p>
      </textarea>

      <script>
         CKEDITOR.inline( 'article-body' );
      </script>

   </body>
</html>
Встроенное редактирование с jQuery
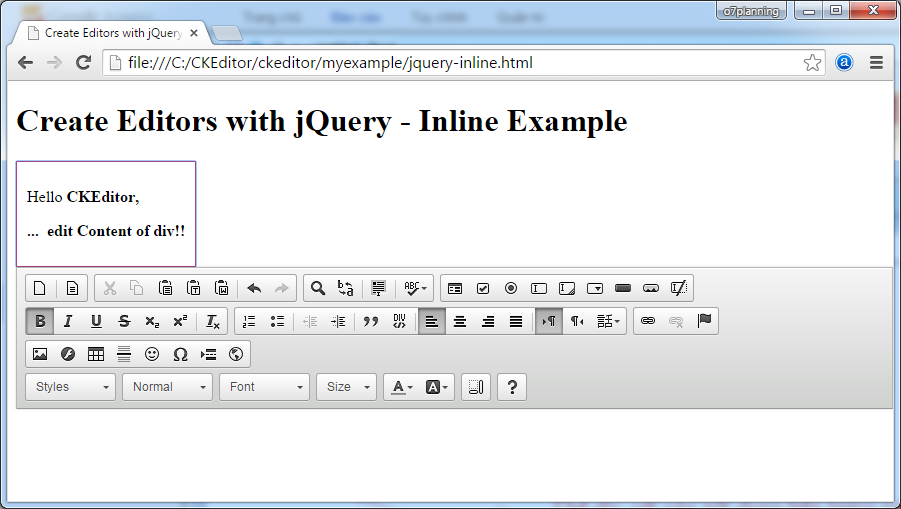
jquery-inline.html
<!DOCTYPE html>
<html>
<head>
  <meta charset="utf-8">
  <title>Create Editors with jQuery - Inline Example</title>
  <script src="http://code.jquery.com/jquery-1.11.0.min.js"></script>

  <script src="../ckeditor.js"></script>
  <script src="../adapters/jquery.js"></script>

  <style>

      #editable
      {
          padding: 10px;
          float: left;
      }

  </style>

  <script>

      CKEDITOR.disableAutoInline = true;

      $( document ).ready( function() {
          $( '#editable' ).ckeditor(); // Use CKEDITOR.inline().
      } );

  </script>
</head>
<body>

  <h1>Create Editors with jQuery - Inline Example</h1>

  <form action="" method="post">

      <div id="editable" contenteditable="true" style="border: 1px solid red;">
          <p>Hello <strong>CKEditor</strong></p>
      </div>

  </form>


</body>
</html>
7. Конфигурация CKEditor
- Статистическая конфигурация:
- Будет иметь эффект для всех CKEditor, для тех что не указывают определенную конфигурацию.
- Конфигурация для определенного CKEditor:
- Имеет эффект только для конфигурированного CKEditor.
Статическая конфигурация
Статистическая конфигурация:
- Будет иметь эффект для всех CKEditor, для тех что не указывают определенную конфигурацию.
Смотрите пример статистичкской конфигурации:
// Configuring the toolbar, displays a few buttons.
CKEDITOR.config.toolbar = [  ['Font','FontSize'], ['Bold','Italic']  ];

// Configuring UI Color.
CKEDITOR.config.uiColor = '#9AB8F3';

CKEDITOR.config.width = '500px';
CKEDITOR.config.height = '70px';
config-static.html
<!DOCTYPE html>
<html>
<head>
    <meta charset="utf-8">
    <title>Config CKEditor - Static config</title>
    <script src="../ckeditor.js"></script>


    <script>
        // Cấu hình lại toolbar, hiển thị một vài Button.
        CKEDITOR.config.toolbar = [  ['Font','FontSize'], ['Bold','Italic']  ];

        // Cấu hình lại màu nền giao diện.
        CKEDITOR.config.uiColor = '#9AB8F3';
        CKEDITOR.config.resize_enabled = false;
        CKEDITOR.config.width = '500px';
        CKEDITOR.config.height = '70px';
    </script>
</head>
<body>
    <h3>CKEditor Static config</h3>

    <p>CKEditor 1</p>
    <textarea class="ckeditor" name="editor1" >
         <p>This is CKEditor 1</p>
    </textarea>

    <p>CKEditor 2</p>
    <textarea class="ckeditor" name="editor2" >
         <p>This is CKEditor 2</p>
    </textarea>

</body>
</html>
Запуск примера:
Смотрите так же конфигурацию Toolbar
Конфигурация для определенного объекта CKEditor
С каждым CKEditor в странице вы можете настраивать для них по разному. Например веб страница имеет 2 разных CKEditor с различием Toolbar в количестве Button.
config-instance.html
<!DOCTYPE html>
<html>
<head>
    <meta charset="utf-8">
    <title>Config CKEditor - instance config</title>
    <script src="../ckeditor.js"></script>


    <script>

        // Background color
        CKEDITOR.config.uiColor = '#FFE6E6';

        // Do not allow resizing
        CKEDITOR.config.resize_enabled = false;

    </script>
</head>
<body>
    <h3>CKEditor instance config</h3>

    <p>CKEditor 1</p>
    <textarea id="editor1" name="editor1">
         <p>This is CKEditor 1</p>
    </textarea>

    <p>CKEditor 2</p>
    <textarea id="editor2" name="editor2">
         <p>This is CKEditor 2</p>
    </textarea>

    <script>
       CKEDITOR.replace( 'editor1' , {
          toolbar: [  ['Font','FontSize'], ['Bold','Italic']  ],
          width: '300px',
          height: '80px',
          resize_enabled : true
       } );

       CKEDITOR.replace( 'editor2' , {
          toolbar: [  ['Font'], ['Bold' ]  ],
          width: '500px',
          height: '100px'
       } );
    </script>

</body>
</html>
Запуск примера:
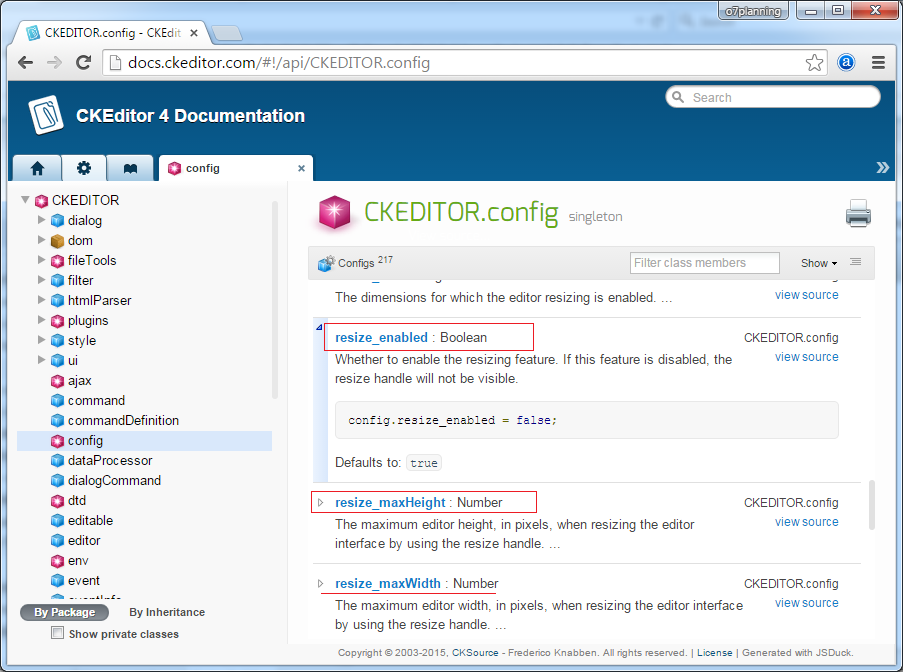
Атрибуты конфигурации
Можете посмотреть список атрибутов конфигурации по ссылке:
8. Конфигурации Toolbar
Есть несколько подходов конфигурации панели инструментов CKEditor:
- Использовать конфигуратор Toolbar (Toolbar Configurator)
- ...
- Конфигурация "Item by Item"
- config.toolbar
- Конфигурация групп Toolbar (Toolbar Groups)
- config.toolbarGroups
Конфигурация Toolbar "Item by Item"
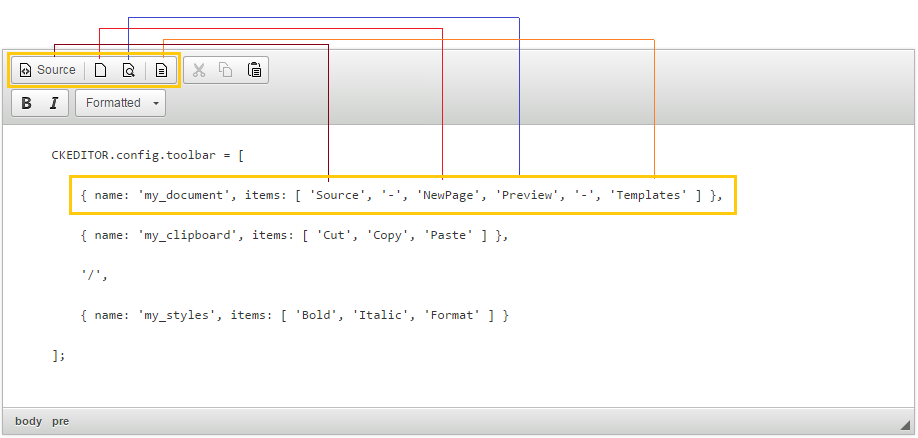
Вы можете конфигурировать Toolbar используя способ "Item by Item", то есть вы объявляете группы, каждая группа состоит из Button.
Далее, фрагмент кода конфигурации Toolbar.
// Declaring groups, each group with the buttons.

CKEDITOR.config.toolbar = [

   { name: 'my_document', items: [ 'Source', '-', 'NewPage', 'Preview', '-', 'Templates' ] },

   { name: 'my_clipboard', items: [ 'Cut', 'Copy', 'Paste' ] },

   '/',

   { name: 'my_styles', items: [ 'Bold', 'Italic', 'Format' ] }

];
Вам так же не нужно объявлять название группы.
CKEDITOR.config.toolbar = [

   [ 'Source', '-', 'NewPage', 'Preview', '-', 'Templates' ],

   [ 'Cut', 'Copy', 'Paste' ] ,

   '/',

   [ 'Bold', 'Italic', 'Format' ]

];
toolbar-itembyitem.html
<!DOCTYPE html>
<html>
<head>
    <meta charset="utf-8">
    <title>CKEditor Toolbar Configuration - Item by Item</title>
    <script src="../ckeditor.js"></script>


    <script>

    CKEDITOR.config.toolbar = [

        { name: 'my_document', items: [ 'Source', '-', 'NewPage', 'Preview', '-', 'Templates' ] },

        { name: 'my_clipboard', items: [ 'Cut', 'Copy', 'Paste' ] },

        '/',

        { name: 'my_styles', items: [ 'Bold', 'Italic', 'Format' ] }

    ];

    CKEDITOR.config.height = '300px';

    </script>
</head>
<body>

<h3>CKEditor Toolbar Configuration - Item by Item</h3>


<textarea class="ckeditor" name="editor1">
    <pre>
    CKEDITOR.config.toolbar = [

        { name: 'my_document', items: [ 'Source', '-', 'NewPage', 'Preview', '-', 'Templates' ] },

        { name: 'my_clipboard', items: [ 'Cut', 'Copy', 'Paste' ] },

        '/',

        { name: 'my_styles', items: [ 'Bold', 'Italic', 'Format' ] }

    ];
    </pre>
</textarea>

</body>
</html>
Запуск примера:
Конфигурация групп Toolbar (Toolbar Groups)
Преимущества групповой конфигурации:
Самое важное преимущество групповой конфигурации панели инструментов (Toolbar Groups Configuration) по сравнению с конфигурацией "Item by item" это? автоматизация.
Теперь для разработчиков plugin возможно определить группу, в которую добавляется button.
Теперь для разработчиков plugin возможно определить группу, в которую добавляется button.
Хотя это необязательно, рекомендуется (recommended) конфигурировать все группы и подгруппы (включая те, что вы не используете), потому что в любое время в будущем, при установке нового plugin, эта кнопка автоматечески появится в панели инструментов без необходимости дальнейшей конфигурации.
Например:
// Ckeditor has built the basic group called "mode", "document", "clipboard", "undo", "styles", "links" .....
// You can define your group with any name, and contain the basic group of CKEditor.
// Your group can namesake with available group of Ckeditor .
// Your group may not need to list the sub-group, then by default it will contain one sub-group has the same name as your group.

CKEDITOR.config.toolbarGroups = [

   { name: 'document',    groups: [ 'mode', 'document' ] },

   { name: 'my_group',   groups: [ 'clipboard', 'undo' ] },

   { name: 'styles' },

   { name: 'links' }

];
Преимущество конфигурации Toolbar Groups это когда вы меняете библиотеку CKEditor в новую версию, если в какой-нибудь group новой версии добавляется новый Button, он автоматически появится на панели Toolbar, вам не нужно менять код вашей веб страницы.
Вы так же можете использовать "/" в конфигурации Toolbar чтобы разрывать строки (Переместите задние button на новую строку).
CKEDITOR.config.toolbarGroups = [

   { name: 'document',    groups: [ 'mode', 'document' ] },

   { name: 'my_clipboard',   groups: [ 'clipboard', 'undo' ] },

   '/',

   { name: 'styles' },

   { name: 'links' }
];
toolbar-group.html
<!DOCTYPE html>
<html>
<head>
    <meta charset="utf-8">
    <title>CKEditor Toolbar Groups Configuration</title>
    <script src="../ckeditor.js"></script>


    <script>

        CKEDITOR.config.toolbarGroups = [

            { name: 'document',    groups: [ 'mode', 'document' ] },

            { name: 'my_clipboard',   groups: [ 'clipboard', 'undo' ] },
            '/',
            { name: 'styles' },

            { name: 'links' }
        ];

        CKEDITOR.config.height = '300px';

    </script>
</head>
<body>

    <h3>CKEditor Toolbar Groups Configuration</h3>


    <textarea class="ckeditor" name="editor1">
        <pre>
        CKEDITOR.config.toolbarGroups = [

            { name: 'document',    groups: [ 'mode', 'document' ] },

            { name: 'my_group',   groups: [ 'clipboard', 'undo' ] },

            { name: 'styles' },

            { name: 'links' }

        ];
        </pre>
    </textarea>

</body>
</html>
Запуск примера:
Список групп и Item готовые на CKEditor
Это определения групп в CKEditor 3.x:
{ name: 'document', items : [ 'Source','-','Save','NewPage','DocProps','Preview','Print','-','Templates' ] },

{ name: 'clipboard', items : [ 'Cut','Copy','Paste','PasteText','PasteFromWord','-','Undo','Redo' ] },

{ name: 'editing', items : [ 'Find','Replace','-','SelectAll','-','SpellChecker', 'Scayt' ] },

{ name: 'forms', items : [ 'Form', 'Checkbox', 'Radio', 'TextField', 'Textarea', 'Select', 'Button', 'ImageButton', 'HiddenField' ] },

{ name: 'basicstyles', items : [ 'Bold','Italic','Underline','Strike','Subscript','Superscript','-','RemoveFormat' ] },

{ name: 'paragraph', items : [ 'NumberedList','BulletedList','-','Outdent','Indent','-','Blockquote','CreateDiv',
                               '-','JustifyLeft','JustifyCenter','JustifyRight','JustifyBlock','-','BidiLtr','BidiRtl' ] },

{ name: 'links', items : [ 'Link','Unlink','Anchor' ] },

{ name: 'insert', items : [ 'Image','Flash','Table','HorizontalRule','Smiley','SpecialChar','PageBreak','Iframe' ] },

{ name: 'styles', items : [ 'Styles','Format','Font','FontSize' ] },

{ name: 'colors', items : [ 'TextColor','BGColor' ] },

{ name: 'tools', items : [ 'Maximize', 'ShowBlocks','-','About' ] }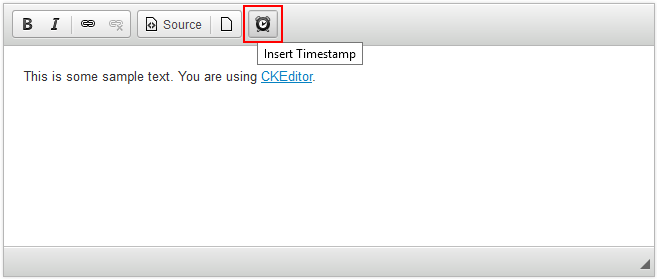

No ADS