Руководство Android Fragment
1. Что такое Android Fragment?
Для дизайна интерфейса, вы можете сделать дизайн нескольких фрагментов (fragment) и соединить их вместе. В данном примере я покажу вам, как работать с фрагментами fragment.
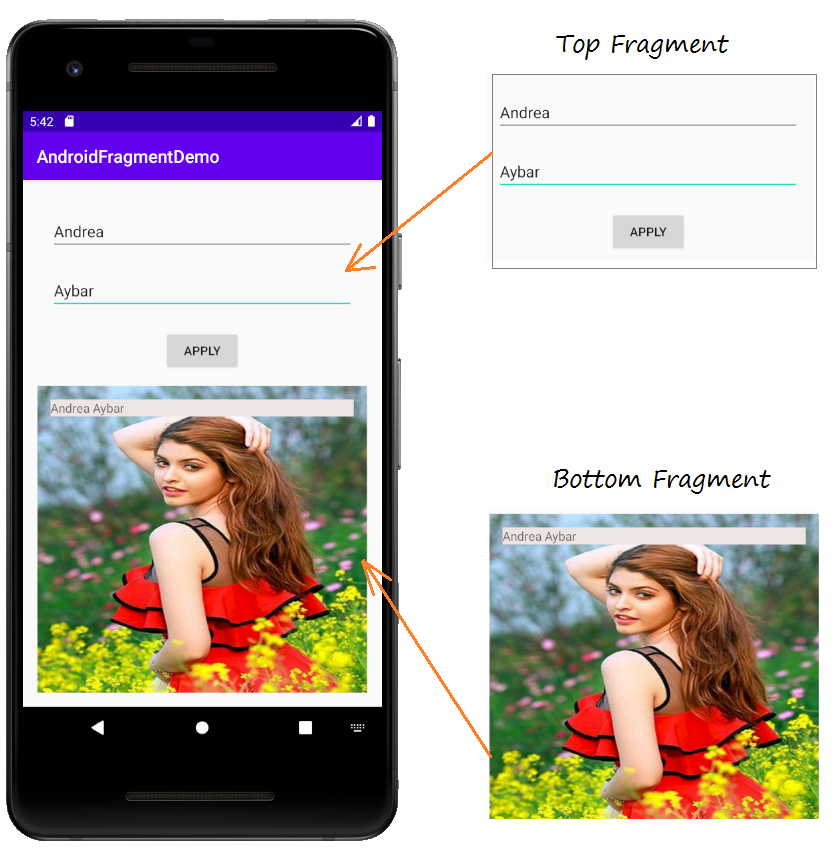
И обрабатывать события взаимодействия между 2-мя fragment
2. Пример использования fragment
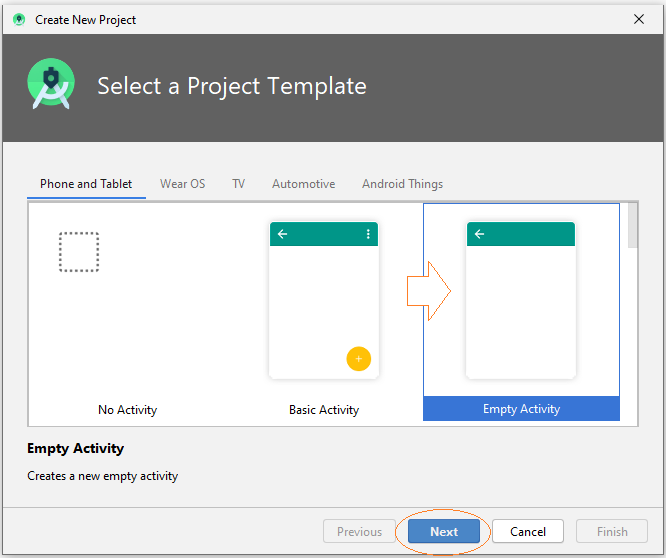
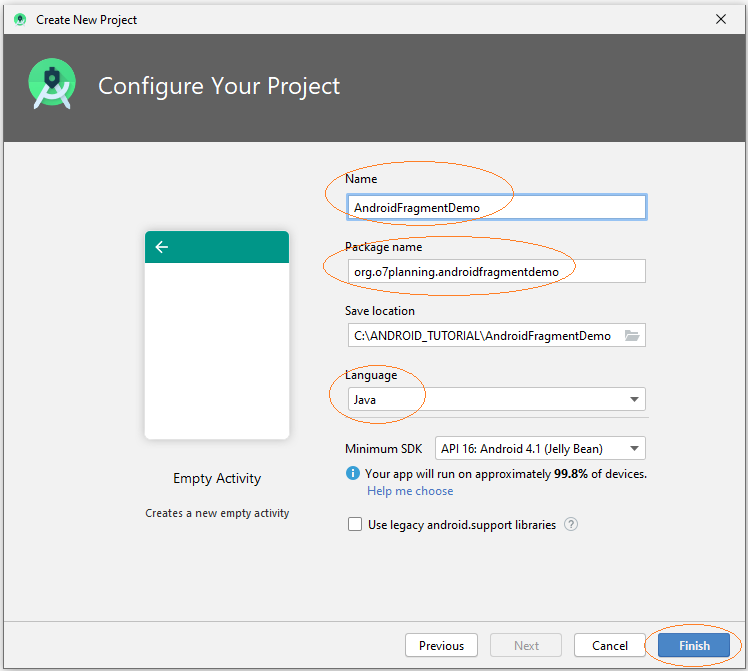
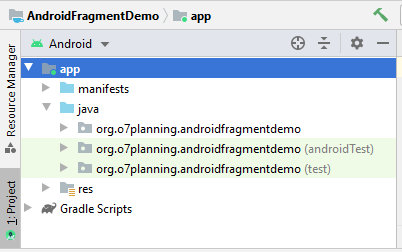
Создать новый Project с названием AndroidFragmentDemo
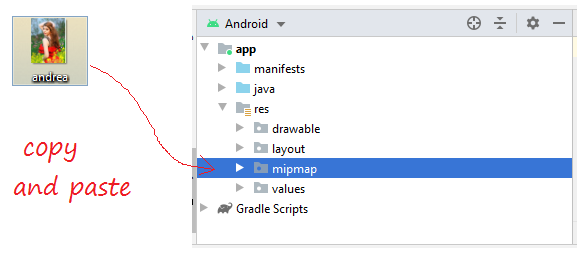
Приготовить файл изображения, например:
- andrea.png

Копировать и вставить файл andrea.jpg в папку mipmap в project.
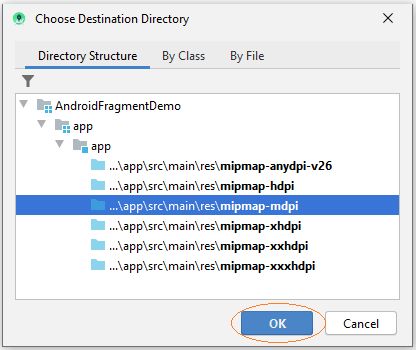
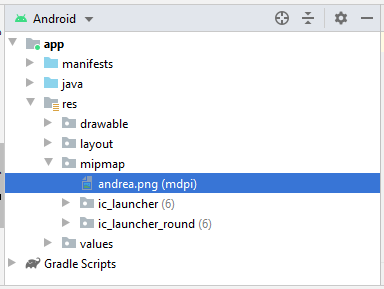
Android Studio потребует вас быбрать качество избражения, которое будет созданоs. Выбрать mipmap-mdpi это изображение со средним качеством
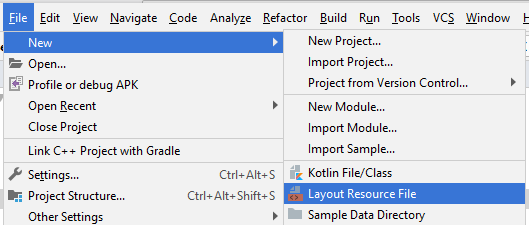
Далее мы создаем файл activity_top.xml:
В Android Studio выбрать:
- File > New > Layout Resource file
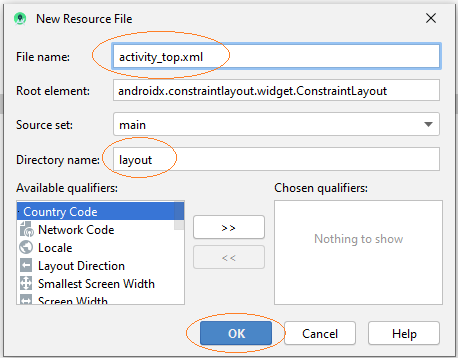
Ввoд:
- File name: activity_top.xml
- Root element: androidx.constraintlayout.widget.ConstraintLayout
- Directory name: layout
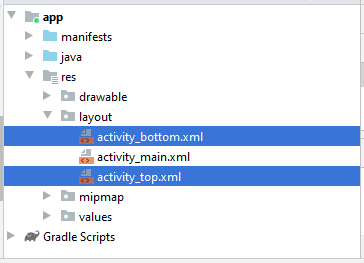
Таким же образом создать файл activity_bottom.xml
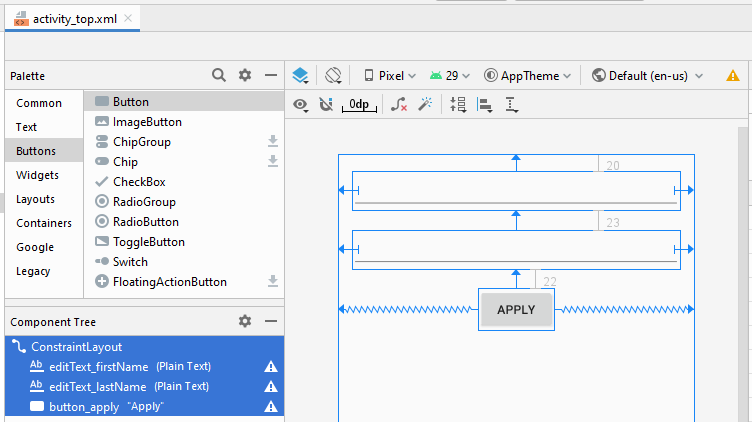
Дизайн интерфейса на activity_top.xml

activity_top.xml
<?xml version="1.0" encoding="utf-8"?>
<androidx.constraintlayout.widget.ConstraintLayout
    xmlns:android="http://schemas.android.com/apk/res/android"
    xmlns:app="http://schemas.android.com/apk/res-auto"
    xmlns:tools="http://schemas.android.com/tools"
    android:layout_width="match_parent"
    android:layout_height="match_parent">

    <EditText
        android:id="@+id/editText_firstName"
        android:layout_width="0dp"
        android:layout_height="wrap_content"
        android:layout_marginStart="16dp"
        android:layout_marginLeft="16dp"
        android:layout_marginTop="20dp"
        android:layout_marginEnd="16dp"
        android:layout_marginRight="16dp"
        android:ems="10"
        android:inputType="textPersonName"
        app:layout_constraintEnd_toEndOf="parent"
        app:layout_constraintStart_toStartOf="parent"
        app:layout_constraintTop_toTopOf="parent" />

    <EditText
        android:id="@+id/editText_lastName"
        android:layout_width="0dp"
        android:layout_height="wrap_content"
        android:layout_marginStart="16dp"
        android:layout_marginLeft="16dp"
        android:layout_marginTop="23dp"
        android:layout_marginEnd="16dp"
        android:layout_marginRight="16dp"
        android:ems="10"
        android:inputType="textPersonName"
        app:layout_constraintEnd_toEndOf="parent"
        app:layout_constraintStart_toStartOf="parent"
        app:layout_constraintTop_toBottomOf="@+id/editText_firstName" />

    <Button
        android:id="@+id/button_apply"
        android:layout_width="wrap_content"
        android:layout_height="wrap_content"
        android:layout_marginTop="22dp"
        android:text="Apply"
        app:layout_constraintEnd_toEndOf="parent"
        app:layout_constraintStart_toStartOf="parent"
        app:layout_constraintTop_toBottomOf="@+id/editText_lastName" />
</androidx.constraintlayout.widget.ConstraintLayout>
Дизайн интерфейса на activity_bottom.xml
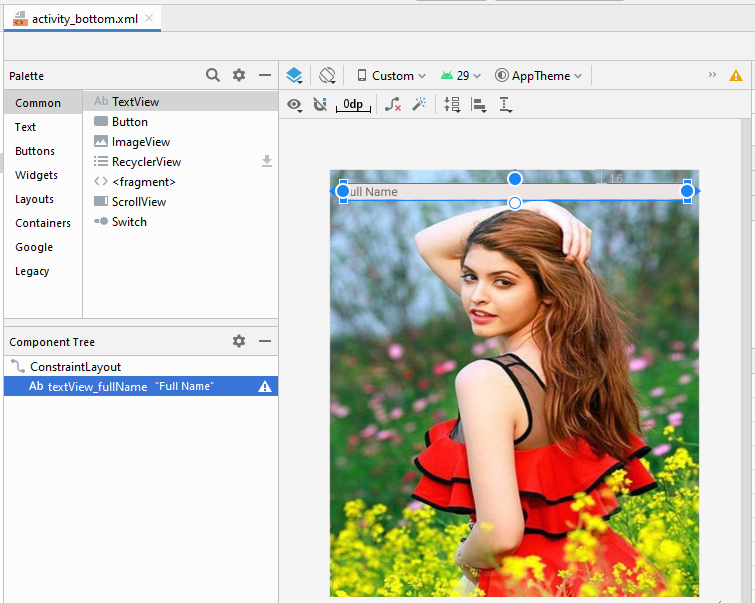
activity_bottom.xml
<?xml version="1.0" encoding="utf-8"?>
<androidx.constraintlayout.widget.ConstraintLayout
    xmlns:android="http://schemas.android.com/apk/res/android"
    xmlns:app="http://schemas.android.com/apk/res-auto"
    xmlns:tools="http://schemas.android.com/tools"
    android:layout_width="match_parent"
    android:layout_height="match_parent"
    android:background="@mipmap/andrea">

    <TextView
        android:id="@+id/textView_fullName"
        android:layout_width="0dp"
        android:layout_height="wrap_content"
        android:layout_marginStart="16dp"
        android:layout_marginLeft="16dp"
        android:layout_marginTop="16dp"
        android:layout_marginEnd="16dp"
        android:layout_marginRight="16dp"
        android:background="#EDE4E4"
        android:text="Full Name"
        app:layout_constraintEnd_toEndOf="parent"
        app:layout_constraintStart_toStartOf="parent"
        app:layout_constraintTop_toTopOf="parent" />
</androidx.constraintlayout.widget.ConstraintLayout>
Если вас интересуют шаги дизайна интерфейса данного приложения, смотрите приложение в конце статьи.
Каждый Fragment будет соответсвовать с классом в Java. Этот класс расширен из класса Fragment.
Создать 2 класса TopFragment и BottomFragment и поменять код.
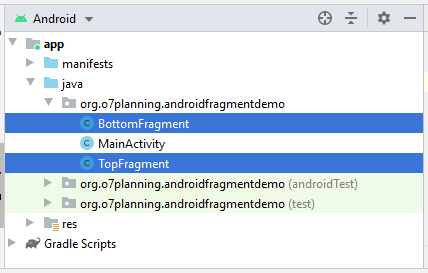
TopFragment .java
package org.o7planning.androidfragmentdemo;

import android.content.Context;
import android.os.Bundle;

import android.view.LayoutInflater;
import android.view.View;
import android.view.ViewGroup;
import android.widget.Button;
import android.widget.EditText;

import androidx.annotation.Nullable;
import androidx.fragment.app.Fragment;

public class TopFragment extends Fragment {

    private EditText editTextFirstName;
    private EditText editTextLastName;
    private Button buttonApply;

    private MainActivity mainActivity;

    @Nullable
    @Override
    public View onCreateView(LayoutInflater inflater, ViewGroup container, Bundle savedInstanceState) {


        // Read xml file and return View object.
        // inflate(@LayoutRes int resource, @Nullable ViewGroup root, boolean attachToRoot)
        View view = inflater.inflate(R.layout.activity_top, container, false);

        editTextFirstName = (EditText) view.findViewById(R.id.editText_firstName);
        editTextLastName = (EditText) view.findViewById(R.id.editText_lastName);

        buttonApply = (Button) view.findViewById(R.id.button_apply);

        buttonApply.setOnClickListener(new View.OnClickListener() {

            @Override
            public void onClick(View v) {
                applyText();
            }
        });

        return view;
    }

    // Called when a fragment is first attached to its context.
    @Override
    public void onAttach(Context context) {
        super.onAttach(context);

        if (context instanceof MainActivity) {
            this.mainActivity = (MainActivity) context;
        }
    }


    private void applyText() {
        String firstName = this.editTextFirstName.getText().toString();
        String lastName = this.editTextLastName.getText().toString();

        this.mainActivity.showText(firstName, lastName);
    }
}
BottomFragment.java
package org.o7planning.androidfragmentdemo;
import android.os.Bundle;
import android.view.LayoutInflater;
import android.view.View;
import android.view.ViewGroup;
import android.widget.TextView;
import androidx.annotation.Nullable;
import androidx.fragment.app.Fragment;
public class BottomFragment extends Fragment {
private TextView textViewFullName;
@Nullable
@Override
public View onCreateView(LayoutInflater inflater, ViewGroup container, Bundle savedInstanceState) {
// Read xml file and return View object.
// inflate(@LayoutRes int resource, @Nullable ViewGroup root, boolean attachToRoot)
View view = inflater.inflate(R.layout.activity_bottom, container, false);
textViewFullName = (TextView) view.findViewById(R.id.textView_fullName);
return view;
}
public void showText(String firstName, String lastName) {
textViewFullName.setText(firstName + " " + lastName);
}
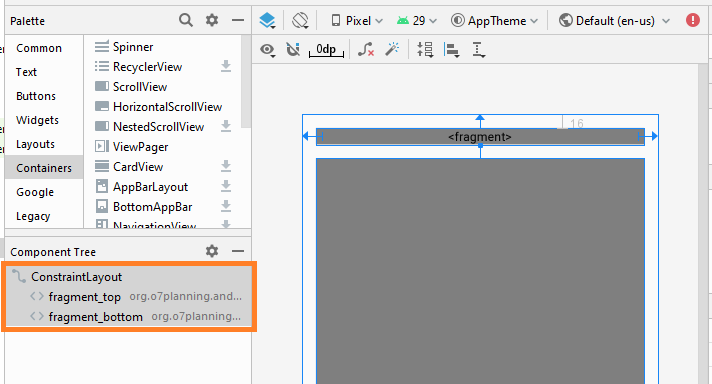
}Теперь, вам нужно переставить fragment на главном интерфейсе в Activity. Открыть файл activity_main.xml
Поменяйте ID для fragment.
- fragment_top
- fragment_bottom
activity_main.xml
<?xml version="1.0" encoding="utf-8"?>
<androidx.constraintlayout.widget.ConstraintLayout
    xmlns:android="http://schemas.android.com/apk/res/android"
    xmlns:app="http://schemas.android.com/apk/res-auto"
    xmlns:tools="http://schemas.android.com/tools"
    android:layout_width="match_parent"
    android:layout_height="match_parent"
    tools:context=".MainActivity">

    <fragment
        android:id="@+id/fragment_top"
        android:name="org.o7planning.androidfragmentdemo.TopFragment"
        android:layout_width="0dp"
        android:layout_height="wrap_content"
        android:layout_marginStart="16dp"
        android:layout_marginLeft="16dp"
        android:layout_marginTop="16dp"
        android:layout_marginEnd="16dp"
        android:layout_marginRight="16dp"
        app:layout_constraintEnd_toEndOf="parent"
        app:layout_constraintStart_toStartOf="parent"
        app:layout_constraintTop_toTopOf="parent" />

    <fragment
        android:id="@+id/fragment_bottom"
        android:name="org.o7planning.androidfragmentdemo.BottomFragment"
        android:layout_width="0dp"
        android:layout_height="0dp"
        android:layout_marginStart="16dp"
        android:layout_marginLeft="16dp"
        android:layout_marginTop="16dp"
        android:layout_marginEnd="16dp"
        android:layout_marginRight="16dp"
        android:layout_marginBottom="16dp"
        app:layout_constraintBottom_toBottomOf="parent"
        app:layout_constraintEnd_toEndOf="parent"
        app:layout_constraintStart_toStartOf="parent"
        app:layout_constraintTop_toBottomOf="@+id/fragment_top" />
</androidx.constraintlayout.widget.ConstraintLayout>
MainActivity.java
package org.o7planning.androidfragmentdemo;

import androidx.appcompat.app.AppCompatActivity;

import android.os.Bundle;

public class MainActivity extends AppCompatActivity {

    @Override
    protected void onCreate(Bundle savedInstanceState) {
        super.onCreate(savedInstanceState);
        setContentView(R.layout.activity_main);
    }

    public void showText(String topImageText, String bottomImageText) {
        BottomFragment bottomFragment
                = (BottomFragment) this.getSupportFragmentManager()
                .findFragmentById(R.id.fragment_bottom);
        bottomFragment.showText(topImageText, bottomImageText);
    }

}
Запуск приложения:


Pуководства Android
- Настроить Android Emulator в Android Studio
- Руководство Android ToggleButton
- Создать простой File Finder Dialog в Android
- Руководство Android TimePickerDialog
- Руководство Android DatePickerDialog
- Что мне нужно для начала работы с Android?
- Установите Android Studio в Windows
- Установите Intel® HAXM для Android Studio
- Руководство Android AsyncTask
- Руководство Android AsyncTaskLoader
- Руководство Android для начинающих - основные примеры
- Как узнать номер телефона Android Emulator и изменить его?
- Руководство Android TextInputLayout
- Руководство Android CardView
- Руководство Android ViewPager2
- Получить номер телефона в Android с помощью TelephonyManager
- Руководство Android Phone Call
- Руководство Android Wifi Scanning
- Руководство Android 2D Game для начинающих
- Руководство Android DialogFragment
- Руководство Android CharacterPickerDialog
- Руководство Android для начинающих - Hello Android
- Использование Android Device File Explorer
- Включить USB Debugging на устройстве Android
- Руководство Android UI Layouts
- Руководство Android SMS
- Руководство Android SQLite Database
- Руководство Google Maps Android API
- Руководство Текст в речь на Android
- Руководство Android Space
- Руководство Android Toast
- Создание пользовательских Android Toast
- Руководство Android SnackBar
- Руководство Android TextView
- Руководство Android TextClock
- Руководство Android EditText
- Руководство Android TextWatcher
- Форматирование номера кредитной карты с помощью Android TextWatcher
- Руководство Android Clipboard
- Создать простой File Chooser в Android
- Руководство Android AutoCompleteTextView и MultiAutoCompleteTextView
- Руководство Android ImageView
- Руководство Android ImageSwitcher
- Руководство Android ScrollView и HorizontalScrollView
- Руководство Android WebView
- Руководство Android SeekBar
- Руководство Android Dialog
- Руководство Android AlertDialog
- Руководство Android RatingBar
- Руководство Android ProgressBar
- Руководство Android Spinner
- Руководство Android Button
- Руководство Android Switch
- Руководство Android ImageButton
- Руководство Android FloatingActionButton
- Руководство Android CheckBox
- Руководство Android RadioGroup и RadioButton
- Руководство Android Chip и ChipGroup
- Использование Image assets и Icon assets Android Studio
- Настройка SD Card для Android Emulator
- Пример ChipGroup и Chip Entry
- Как добавить внешние библиотеки в Android Project в Android Studio?
- Как отключить разрешения, уже предоставленные приложению Android?
- Как удалить приложения из Android Emulator?
- Руководство Android LinearLayout
- Руководство Android TableLayout
- Руководство Android FrameLayout
- Руководство Android QuickContactBadge
- Руководство Android StackView
- Руководство Android Camera
- Руководство Android MediaPlayer
- Руководство Android VideoView
- Воспроизведение звуковых эффектов в Android с помощью SoundPool
- Руководство Android Networking
- Руководство Android JSON Parser
- Руководство Android SharedPreferences
- Руководство Android Internal Storage
- Руководство Android External Storage
- Руководство Android Intents
- Пример явного Android Intent, вызов другого Intent
- Пример неявного Android Intent, откройте URL, отправьте email
- Руководство Android Services
- Использовать оповещения в Android - Android Notification
- Руководство Android DatePicker
- Руководство Android TimePicker
- Руководство Android Chronometer
- Руководство Android OptionMenu
- Руководство Android ContextMenu
- Руководство Android PopupMenu
- Руководство Android Fragment
- Руководство Android ListView
- Android ListView с Checkbox с помощью ArrayAdapter
- Руководство Android GridView
Show More