Руководство Android ImageSwitcher

2. Пример с Android ImageSwitcher
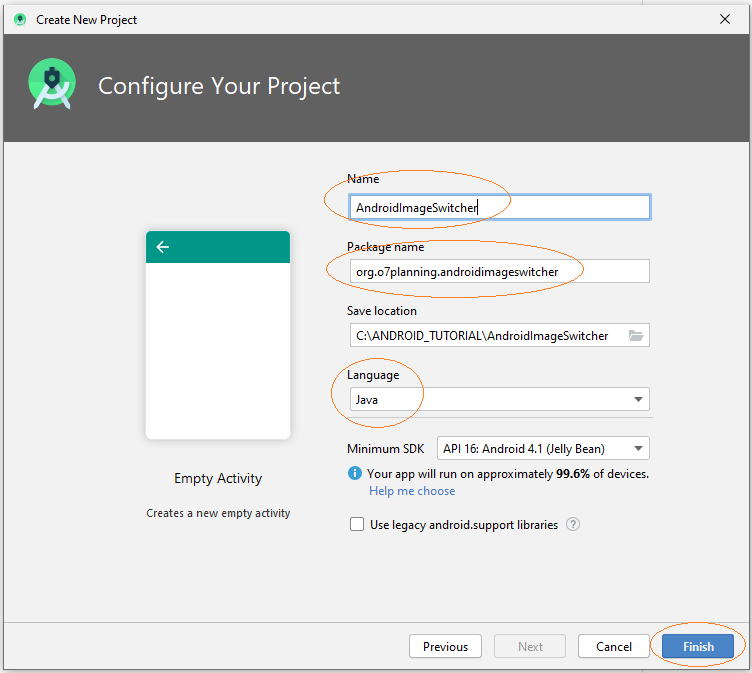
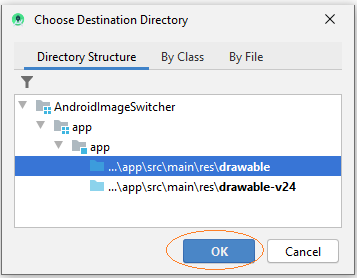
Создать project с названием AndroidImageSwitcher:
- File > New Project > Empty Activity
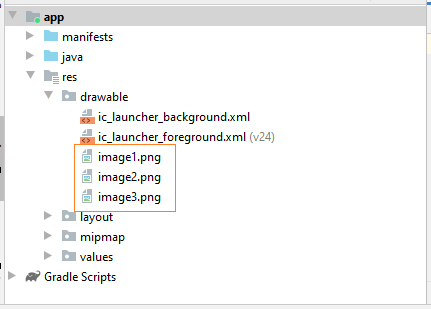
Вам нужно несколько изображений для примера:
image1.png |  |
image2.png |  |
image3.png |  |
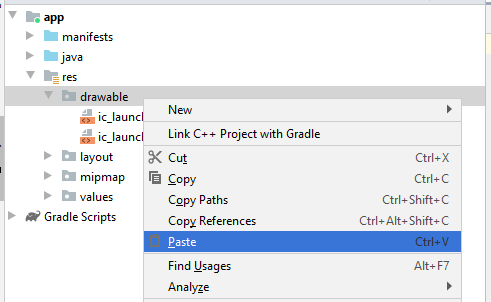
Скопировать эти изображения в папку drawable.
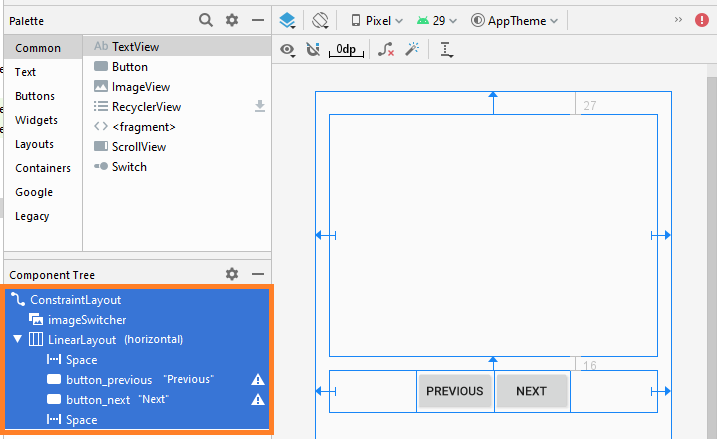
Интерфейс приложения:

Если вас интересую шаги дизайна интерфейса данного приложения, смотрите в приложении в конце статьи.
main_actvity.xml
<?xml version="1.0" encoding="utf-8"?>
<androidx.constraintlayout.widget.ConstraintLayout
    xmlns:android="http://schemas.android.com/apk/res/android"
    xmlns:app="http://schemas.android.com/apk/res-auto"
    xmlns:tools="http://schemas.android.com/tools"
    android:layout_width="match_parent"
    android:layout_height="match_parent"
    tools:context=".MainActivity">

    <ImageSwitcher
        android:id="@+id/imageSwitcher"
        android:layout_width="0dp"
        android:layout_height="279dp"
        android:layout_marginStart="16dp"
        android:layout_marginLeft="16dp"
        android:layout_marginTop="27dp"
        android:layout_marginEnd="16dp"
        android:layout_marginRight="16dp"
        app:layout_constraintEnd_toEndOf="parent"
        app:layout_constraintStart_toStartOf="parent"
        app:layout_constraintTop_toTopOf="parent" />

    <LinearLayout
        android:layout_width="0dp"
        android:layout_height="wrap_content"
        android:layout_marginStart="16dp"
        android:layout_marginLeft="16dp"
        android:layout_marginTop="16dp"
        android:layout_marginEnd="16dp"
        android:layout_marginRight="16dp"
        android:orientation="horizontal"
        app:layout_constraintEnd_toEndOf="parent"
        app:layout_constraintStart_toStartOf="parent"
        app:layout_constraintTop_toBottomOf="@+id/imageSwitcher">

        <Space
            android:layout_width="wrap_content"
            android:layout_height="wrap_content"
            android:layout_weight="1" />

        <Button
            android:id="@+id/button_previous "
            android:layout_width="wrap_content"
            android:layout_height="wrap_content"
            android:layout_weight="0"
            android:text="Previous" />

        <Button
            android:id="@+id/button_next"
            android:layout_width="wrap_content"
            android:layout_height="wrap_content"
            android:layout_weight="0"
            android:text="Next" />

        <Space
            android:layout_width="wrap_content"
            android:layout_height="wrap_content"
            android:layout_weight="1" />
    </LinearLayout>

</androidx.constraintlayout.widget.ConstraintLayout>
MainActivity.java
package org.o7planning.androidimageswitcher;

import android.os.Bundle;
import android.app.ActionBar.LayoutParams;
import android.graphics.Color;
import android.util.Log;
import android.view.View;
import android.view.animation.Animation;
import android.view.animation.AnimationUtils;
import android.widget.Button;
import android.widget.ImageSwitcher;
import android.widget.ImageView;
import android.widget.Toast;
import android.widget.ViewSwitcher.ViewFactory;

import androidx.appcompat.app.AppCompatActivity;

public class MainActivity extends AppCompatActivity {

    private ImageSwitcher imageSwitcher;
    private Button buttonPrevious;
    private Button buttonNext;

    private final String[] imageNames={"image1", "image2", "image3"};
    private int currentIndex;

    @Override
    protected void onCreate(Bundle savedInstanceState) {
        super.onCreate(savedInstanceState);

        setContentView(R.layout.activity_main);

        buttonPrevious = (Button) findViewById(R.id.button_previous);
        buttonNext = (Button) findViewById(R.id.button_next);

        imageSwitcher = (ImageSwitcher) findViewById(R.id.imageSwitcher);

        // Animation when switching to another image.
        Animation out= AnimationUtils.loadAnimation(this, android.R.anim.fade_out);
        Animation in= AnimationUtils.loadAnimation(this, android.R.anim.fade_in);

        // Set animation when switching images.
        imageSwitcher.setInAnimation(in);
        imageSwitcher.setOutAnimation(out);

        //
        imageSwitcher.setFactory(new ViewFactory() {

            // Returns the view to show Image
            // (Usually should use ImageView)
            @Override
            public View makeView() {
                ImageView imageView = new ImageView(getApplicationContext());

                imageView.setBackgroundColor(Color.LTGRAY);
                imageView.setScaleType(ImageView.ScaleType.CENTER);

                ImageSwitcher.LayoutParams params= new ImageSwitcher.LayoutParams(
                        LayoutParams.MATCH_PARENT, LayoutParams.MATCH_PARENT);
                imageView.setLayoutParams(params);
                return imageView;
            }
        });

        this.currentIndex=0;
        this.showImage(this.currentIndex);

        buttonPrevious.setOnClickListener(new View.OnClickListener() {
            @Override
            public void onClick(View v) {
                previousImage();
            }
        });

        buttonNext.setOnClickListener(new View.OnClickListener() {
            @Override
            public void onClick(View v) {
                nextImage();
            }
        });
    }


    private void previousImage()  {
        if(currentIndex > 0) {
            currentIndex--;
        }else  {
            Toast.makeText(getApplicationContext(), "No Previous Image", Toast.LENGTH_SHORT).show();
            return;
        }
        this.showImage(currentIndex);
    }

    private void nextImage()  {
        if(currentIndex < this.imageNames.length-1) {
            currentIndex++;
        }else  {
            Toast.makeText(getApplicationContext(), "No Next Image", Toast.LENGTH_SHORT).show();
            return;
        }
        this.showImage(currentIndex);
    }


    private void showImage(int imgIndex)  {
        String imageName= this.imageNames[imgIndex];

        int resId= getDrawableResIdByName(imageName);
        if(resId!=  0) {
            this.imageSwitcher.setImageResource(resId);
        }
    }

    // Find Image ID corresponding to the name of the image (in the drawable folder).
    public int getDrawableResIdByName(String resName)  {
        String pkgName = this.getPackageName();
        // Return 0 if not found.
        int resID = this.getResources().getIdentifier(resName , "drawable", pkgName);
        Log.i("MyLog", "Res Name: " + resName + "==> Res ID = " + resID);
        return resID;
    }

}
Запуск приложения:

3. Приложение: Дизайн интерфеса
Я не знаю почему нет готовых ImageSwitcher на окне дизайна Android Studio 3.6.x, поэтому вы не сможете перетащить его в интерфейс. Лучший способ это довить следующий XML код в activity_main.xml файл и вы получите ImageSwitcher на интерфейсе.
<ImageSwitcher
        android:layout_width="100dp"
        android:layout_height="100dp" />
Настроить ID, Text для компонентов на интерфейсе.
Pуководства Android
- Настроить Android Emulator в Android Studio
- Руководство Android ToggleButton
- Создать простой File Finder Dialog в Android
- Руководство Android TimePickerDialog
- Руководство Android DatePickerDialog
- Что мне нужно для начала работы с Android?
- Установите Android Studio в Windows
- Установите Intel® HAXM для Android Studio
- Руководство Android AsyncTask
- Руководство Android AsyncTaskLoader
- Руководство Android для начинающих - основные примеры
- Как узнать номер телефона Android Emulator и изменить его?
- Руководство Android TextInputLayout
- Руководство Android CardView
- Руководство Android ViewPager2
- Получить номер телефона в Android с помощью TelephonyManager
- Руководство Android Phone Call
- Руководство Android Wifi Scanning
- Руководство Android 2D Game для начинающих
- Руководство Android DialogFragment
- Руководство Android CharacterPickerDialog
- Руководство Android для начинающих - Hello Android
- Использование Android Device File Explorer
- Включить USB Debugging на устройстве Android
- Руководство Android UI Layouts
- Руководство Android SMS
- Руководство Android SQLite Database
- Руководство Google Maps Android API
- Руководство Текст в речь на Android
- Руководство Android Space
- Руководство Android Toast
- Создание пользовательских Android Toast
- Руководство Android SnackBar
- Руководство Android TextView
- Руководство Android TextClock
- Руководство Android EditText
- Руководство Android TextWatcher
- Форматирование номера кредитной карты с помощью Android TextWatcher
- Руководство Android Clipboard
- Создать простой File Chooser в Android
- Руководство Android AutoCompleteTextView и MultiAutoCompleteTextView
- Руководство Android ImageView
- Руководство Android ImageSwitcher
- Руководство Android ScrollView и HorizontalScrollView
- Руководство Android WebView
- Руководство Android SeekBar
- Руководство Android Dialog
- Руководство Android AlertDialog
- Руководство Android RatingBar
- Руководство Android ProgressBar
- Руководство Android Spinner
- Руководство Android Button
- Руководство Android Switch
- Руководство Android ImageButton
- Руководство Android FloatingActionButton
- Руководство Android CheckBox
- Руководство Android RadioGroup и RadioButton
- Руководство Android Chip и ChipGroup
- Использование Image assets и Icon assets Android Studio
- Настройка SD Card для Android Emulator
- Пример ChipGroup и Chip Entry
- Как добавить внешние библиотеки в Android Project в Android Studio?
- Как отключить разрешения, уже предоставленные приложению Android?
- Как удалить приложения из Android Emulator?
- Руководство Android LinearLayout
- Руководство Android TableLayout
- Руководство Android FrameLayout
- Руководство Android QuickContactBadge
- Руководство Android StackView
- Руководство Android Camera
- Руководство Android MediaPlayer
- Руководство Android VideoView
- Воспроизведение звуковых эффектов в Android с помощью SoundPool
- Руководство Android Networking
- Руководство Android JSON Parser
- Руководство Android SharedPreferences
- Руководство Android Internal Storage
- Руководство Android External Storage
- Руководство Android Intents
- Пример явного Android Intent, вызов другого Intent
- Пример неявного Android Intent, откройте URL, отправьте email
- Руководство Android Services
- Использовать оповещения в Android - Android Notification
- Руководство Android DatePicker
- Руководство Android TimePicker
- Руководство Android Chronometer
- Руководство Android OptionMenu
- Руководство Android ContextMenu
- Руководство Android PopupMenu
- Руководство Android Fragment
- Руководство Android ListView
- Android ListView с Checkbox с помощью ArrayAdapter
- Руководство Android GridView
Show More